Configuring EVI
Guide to configuring the Empathic Voice Interface (EVI).
EVI is highly configurable, enabling you to adjust behavior and functionality to meet your application needs. An EVI Config is a reusable set of configuration options that can be applied when starting a chat session.
This guide details available configuration options, default settings, example templates, and instructions for creating and applying your own EVI Config.
EVI Configs are persisted and applied at the start of a Chat. To modify EVI settings dynamically during a Chat session, see the Session settings guide.
Configuration options
EVI supports the following configuration options:
Configs, Prompts, and Tools are versioned to support iterative development—refine your setup over time and roll back to earlier versions whenever you need.
Default configuration options
EVI includes a set of default config options that apply automatically when not explicitly specified.
By default, EVI versions 3 and 4-mini use no preset voice, hume-evi-3 language model, the default system
prompt, and do not include any tools.
Template configurations
When creating an EVI configuration in the Platform UI, you can select a prebuilt template as your starting point. Each template provides a recommended voice, language model, and system prompt tailored to a sample voice-assistant use case.
Expand the template config options below for more details:
Customer support
Customer Support: an AI voice agent that resolves callers’ issues efficiently while creating a warm, human experience.
Spanish learning companion
Spanish learning companion: A warm, patient Spanish professor with a focus on clarity and encouragement, tailored for Spanish language learning sessions.
Your smart companion
Your smart companion: a smart assistant modeled after an Android helper, designed to leverage our built-in web search tool to fetch real-time information and deliver quick answers during a chat session.
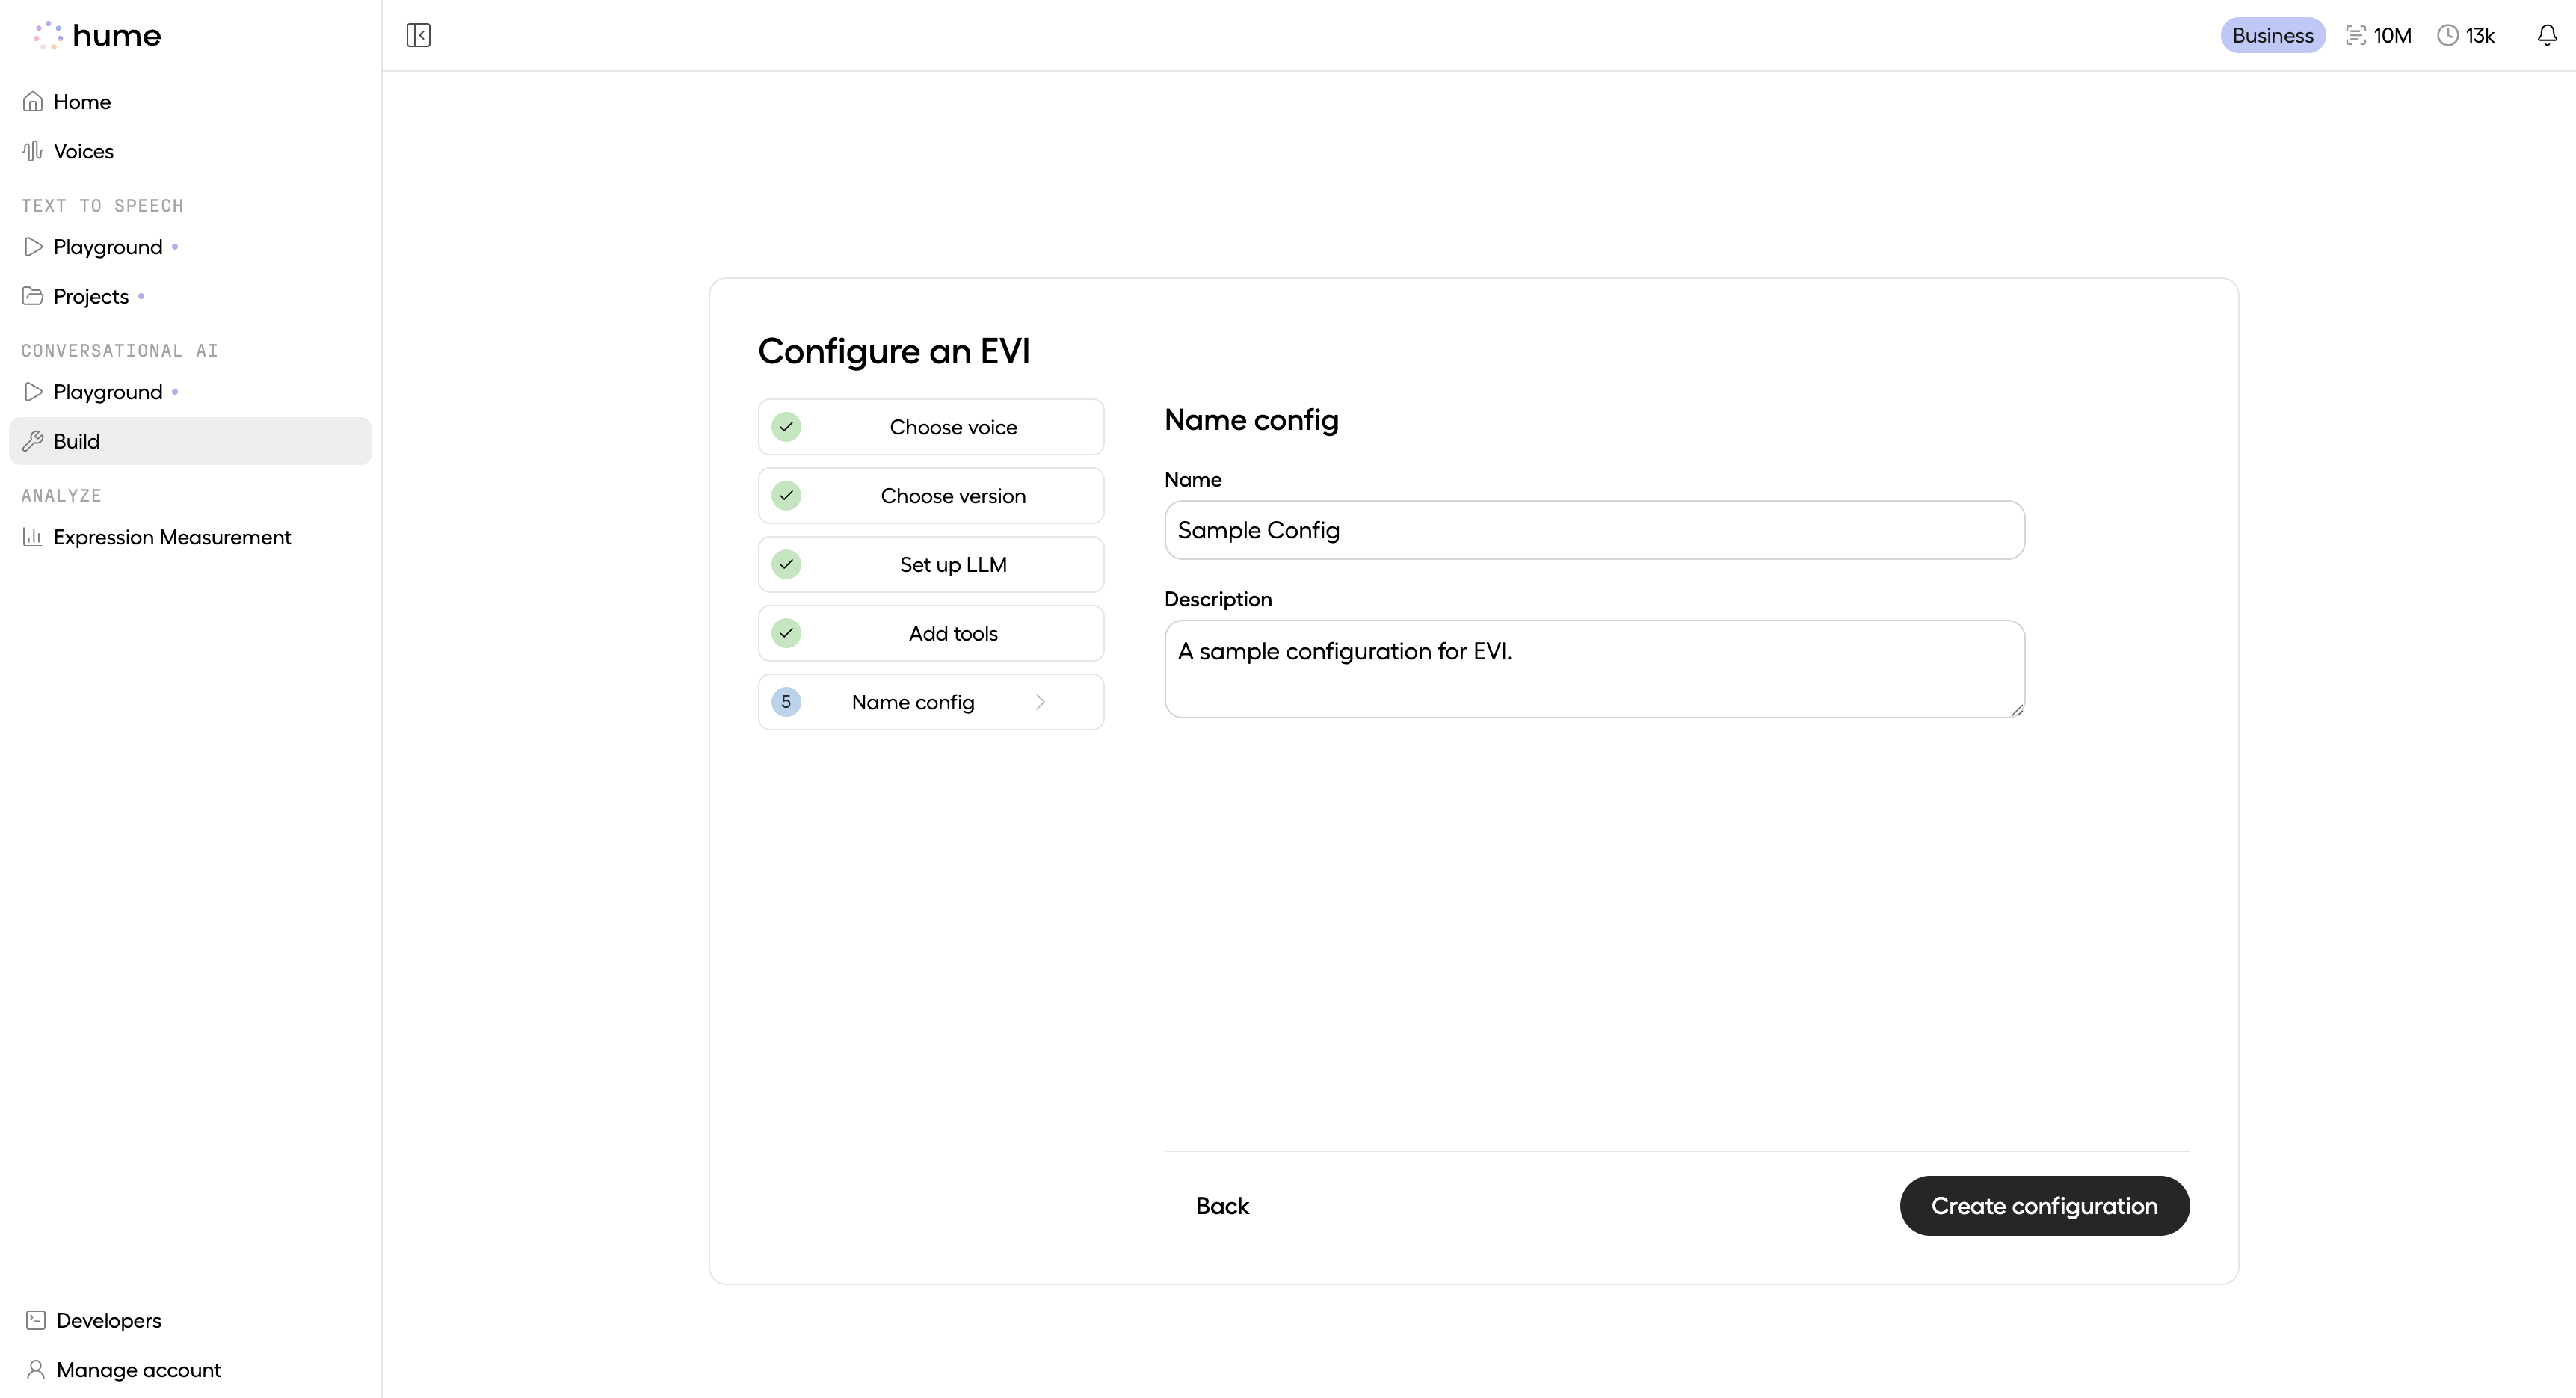
Creating a configuration
See instructions below for creating an EVI configuration through the Platform.
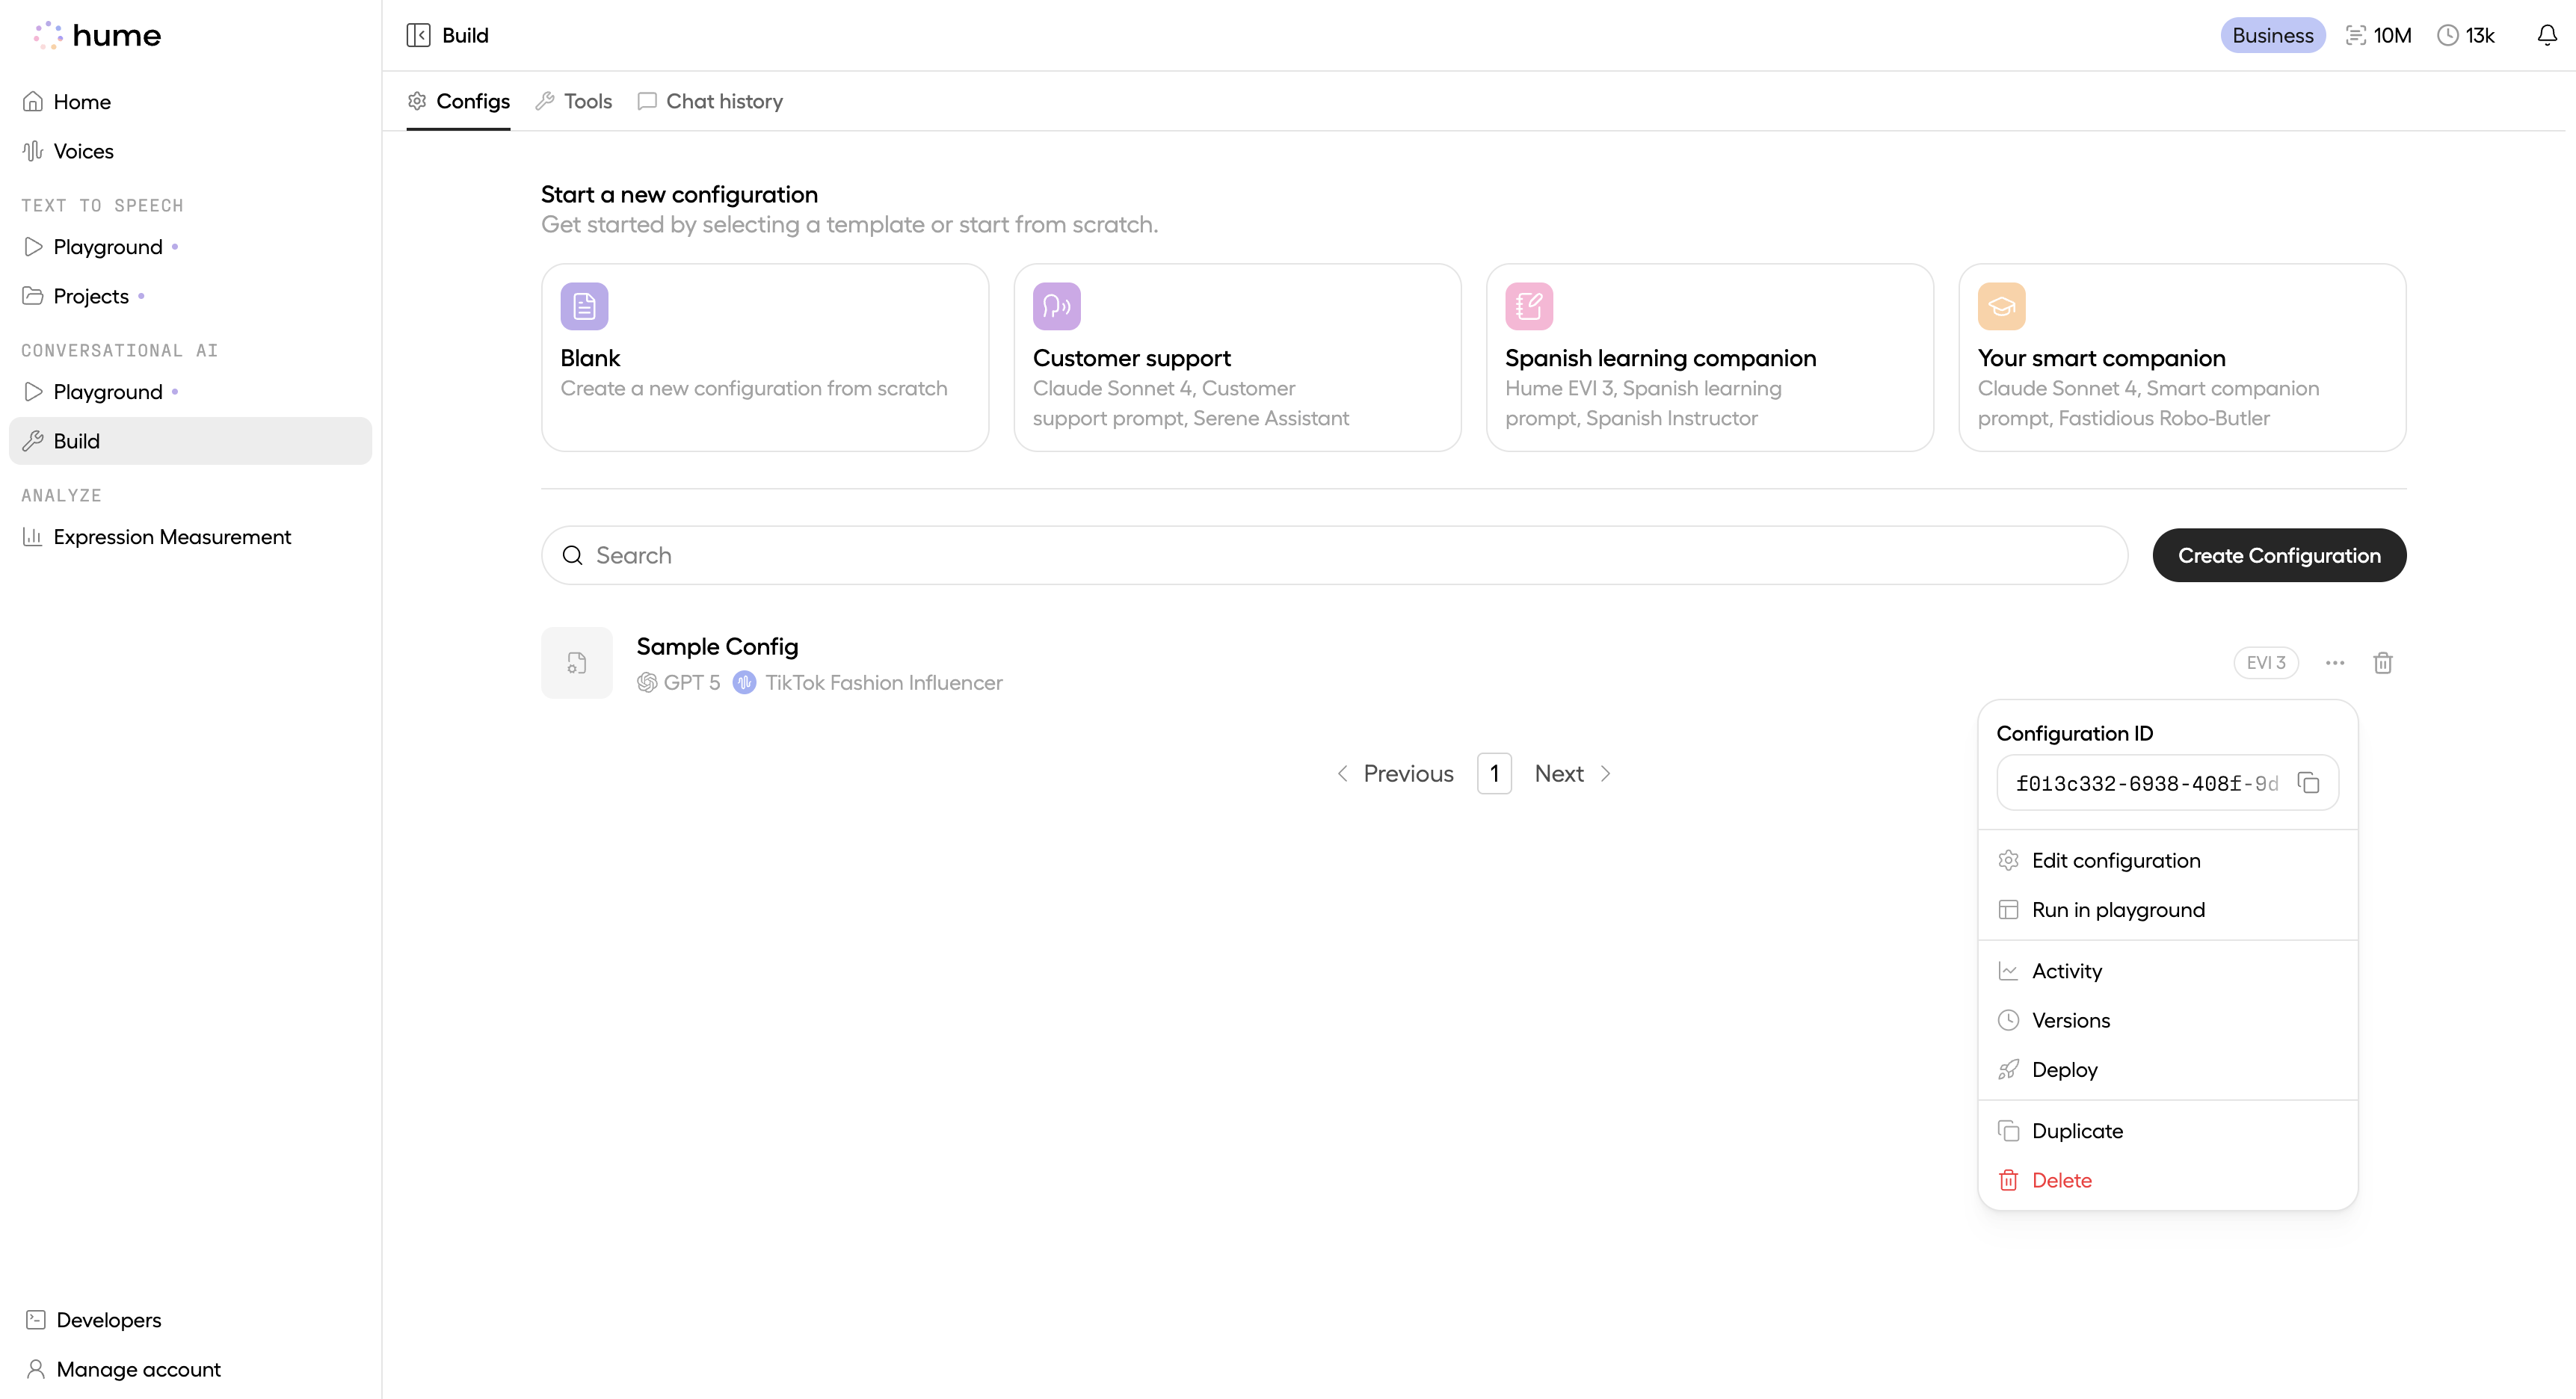
Navigate to the Configurations page
In the Platform, find the EVI Configurations page. Click the Create Configuration button to begin.
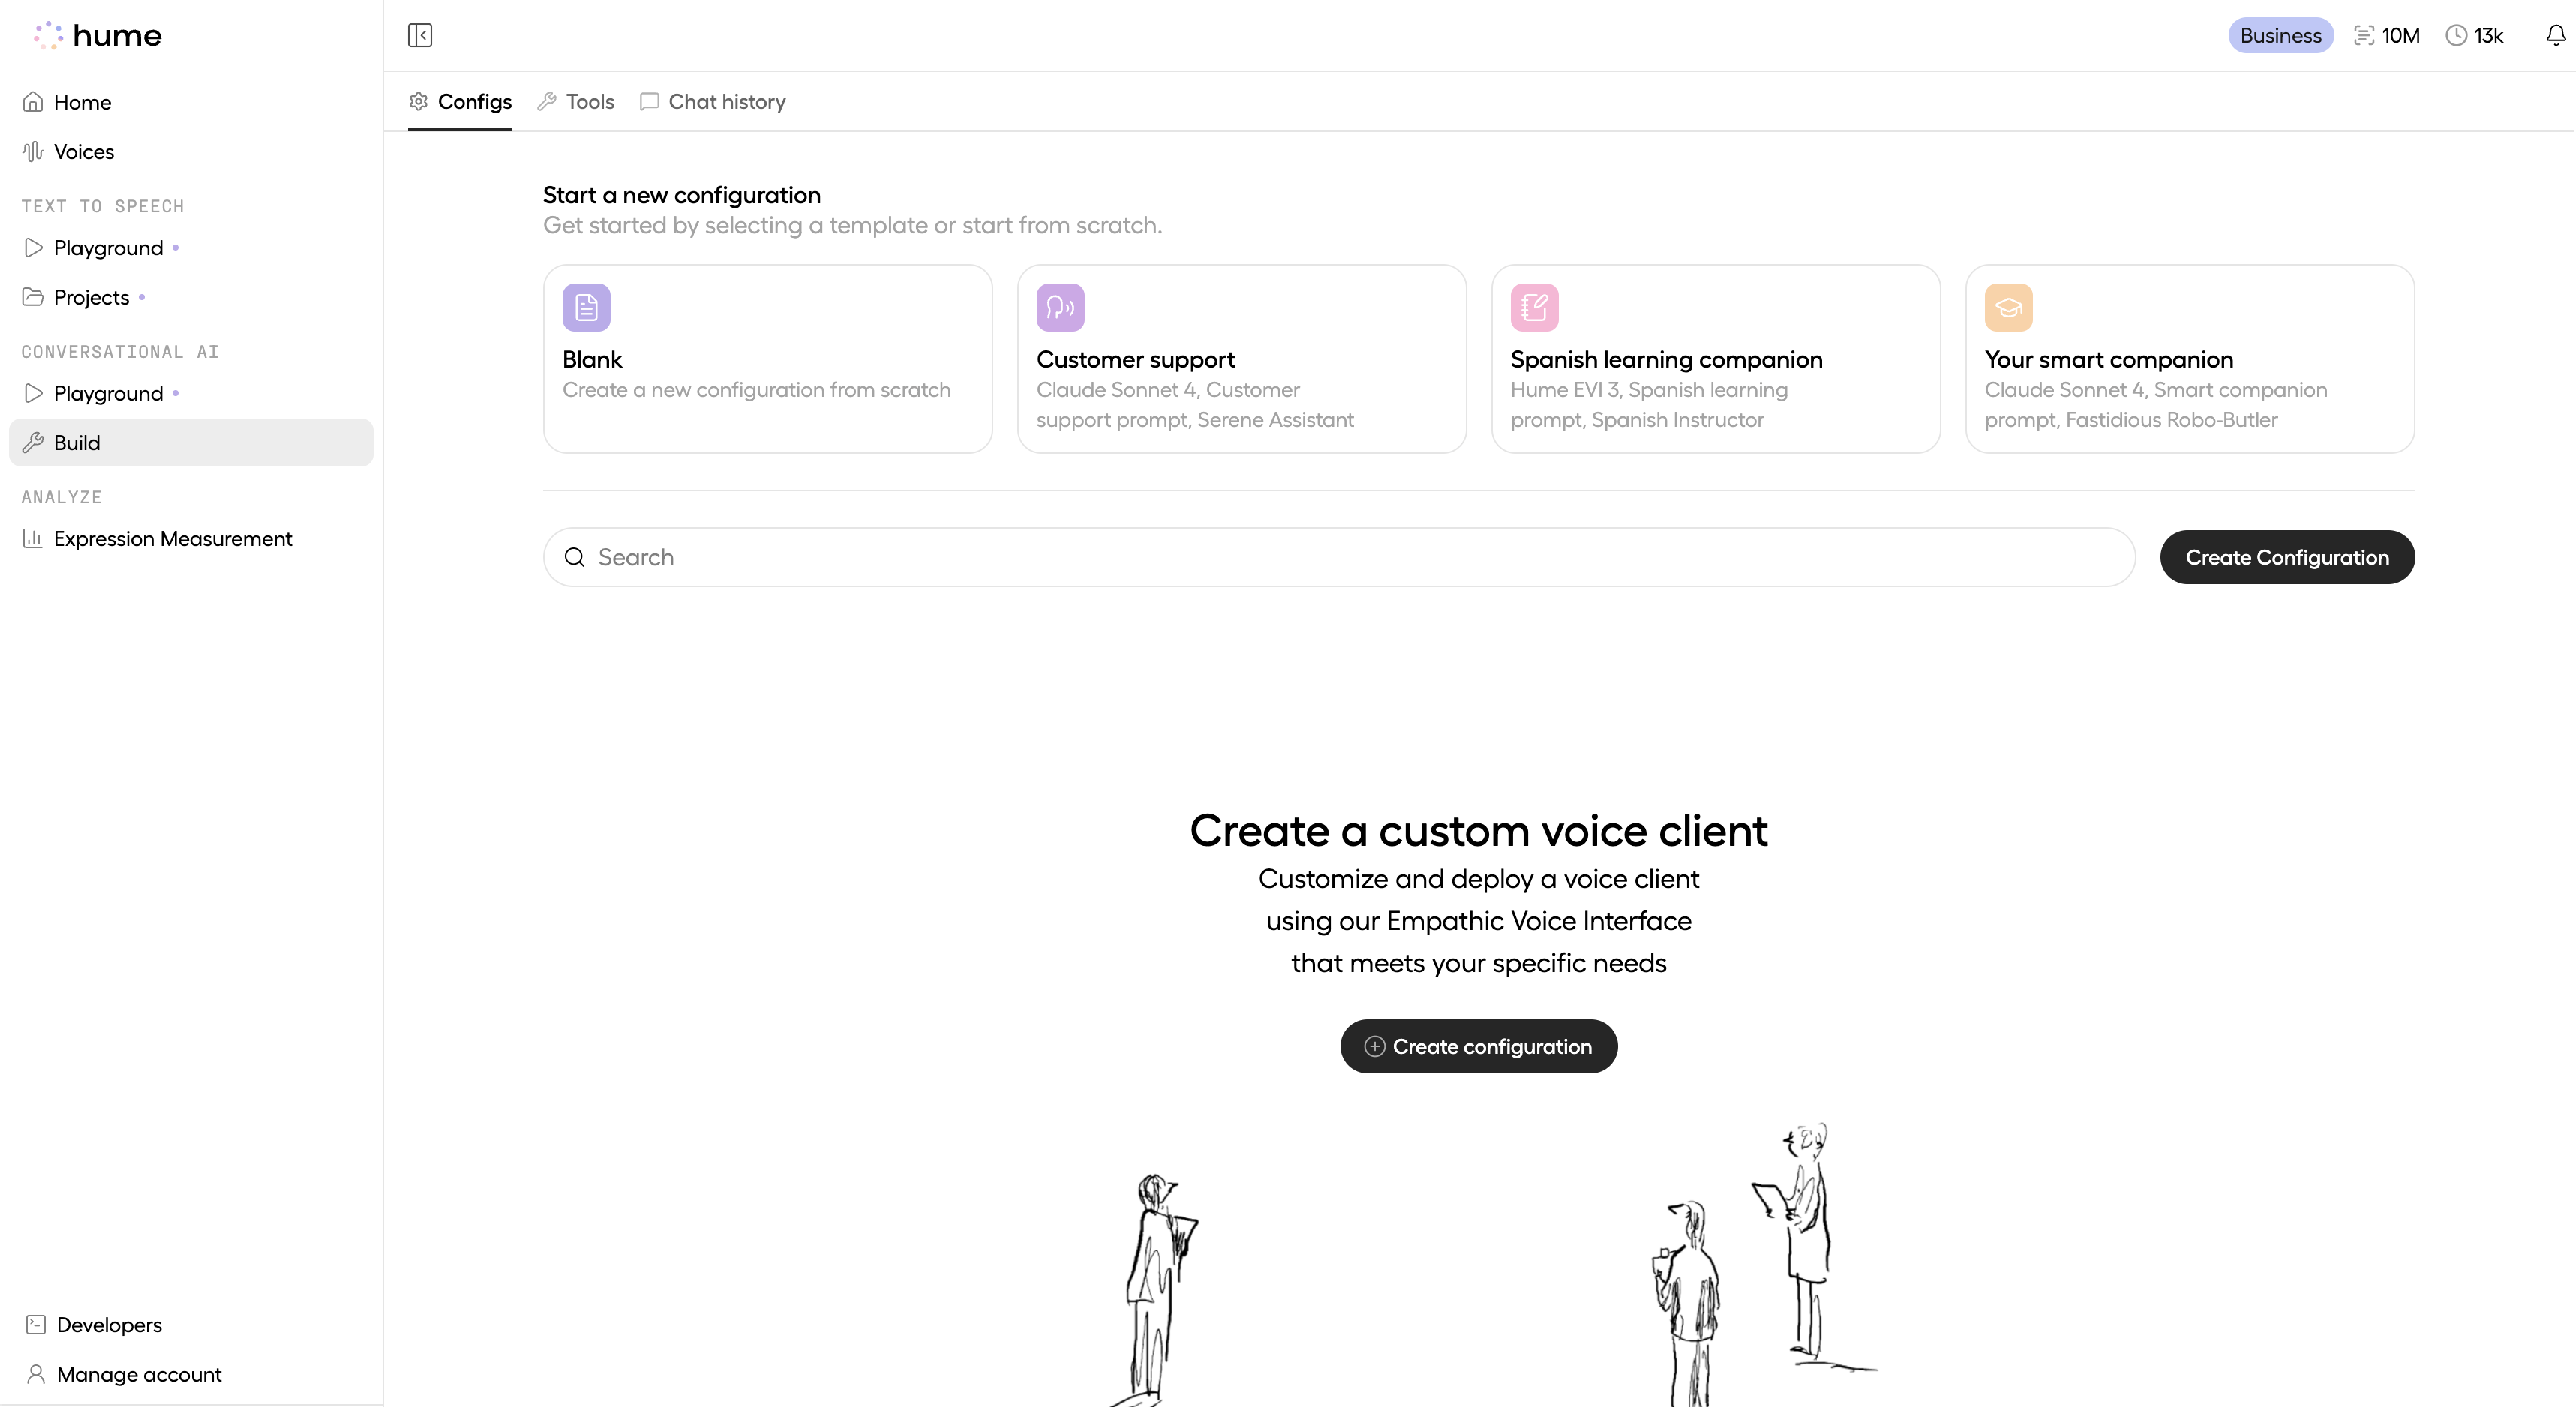
Select a template
Select a template to get started quickly, or create a configuration from scratch. This guide demonstrates creating a configuration from scratch.

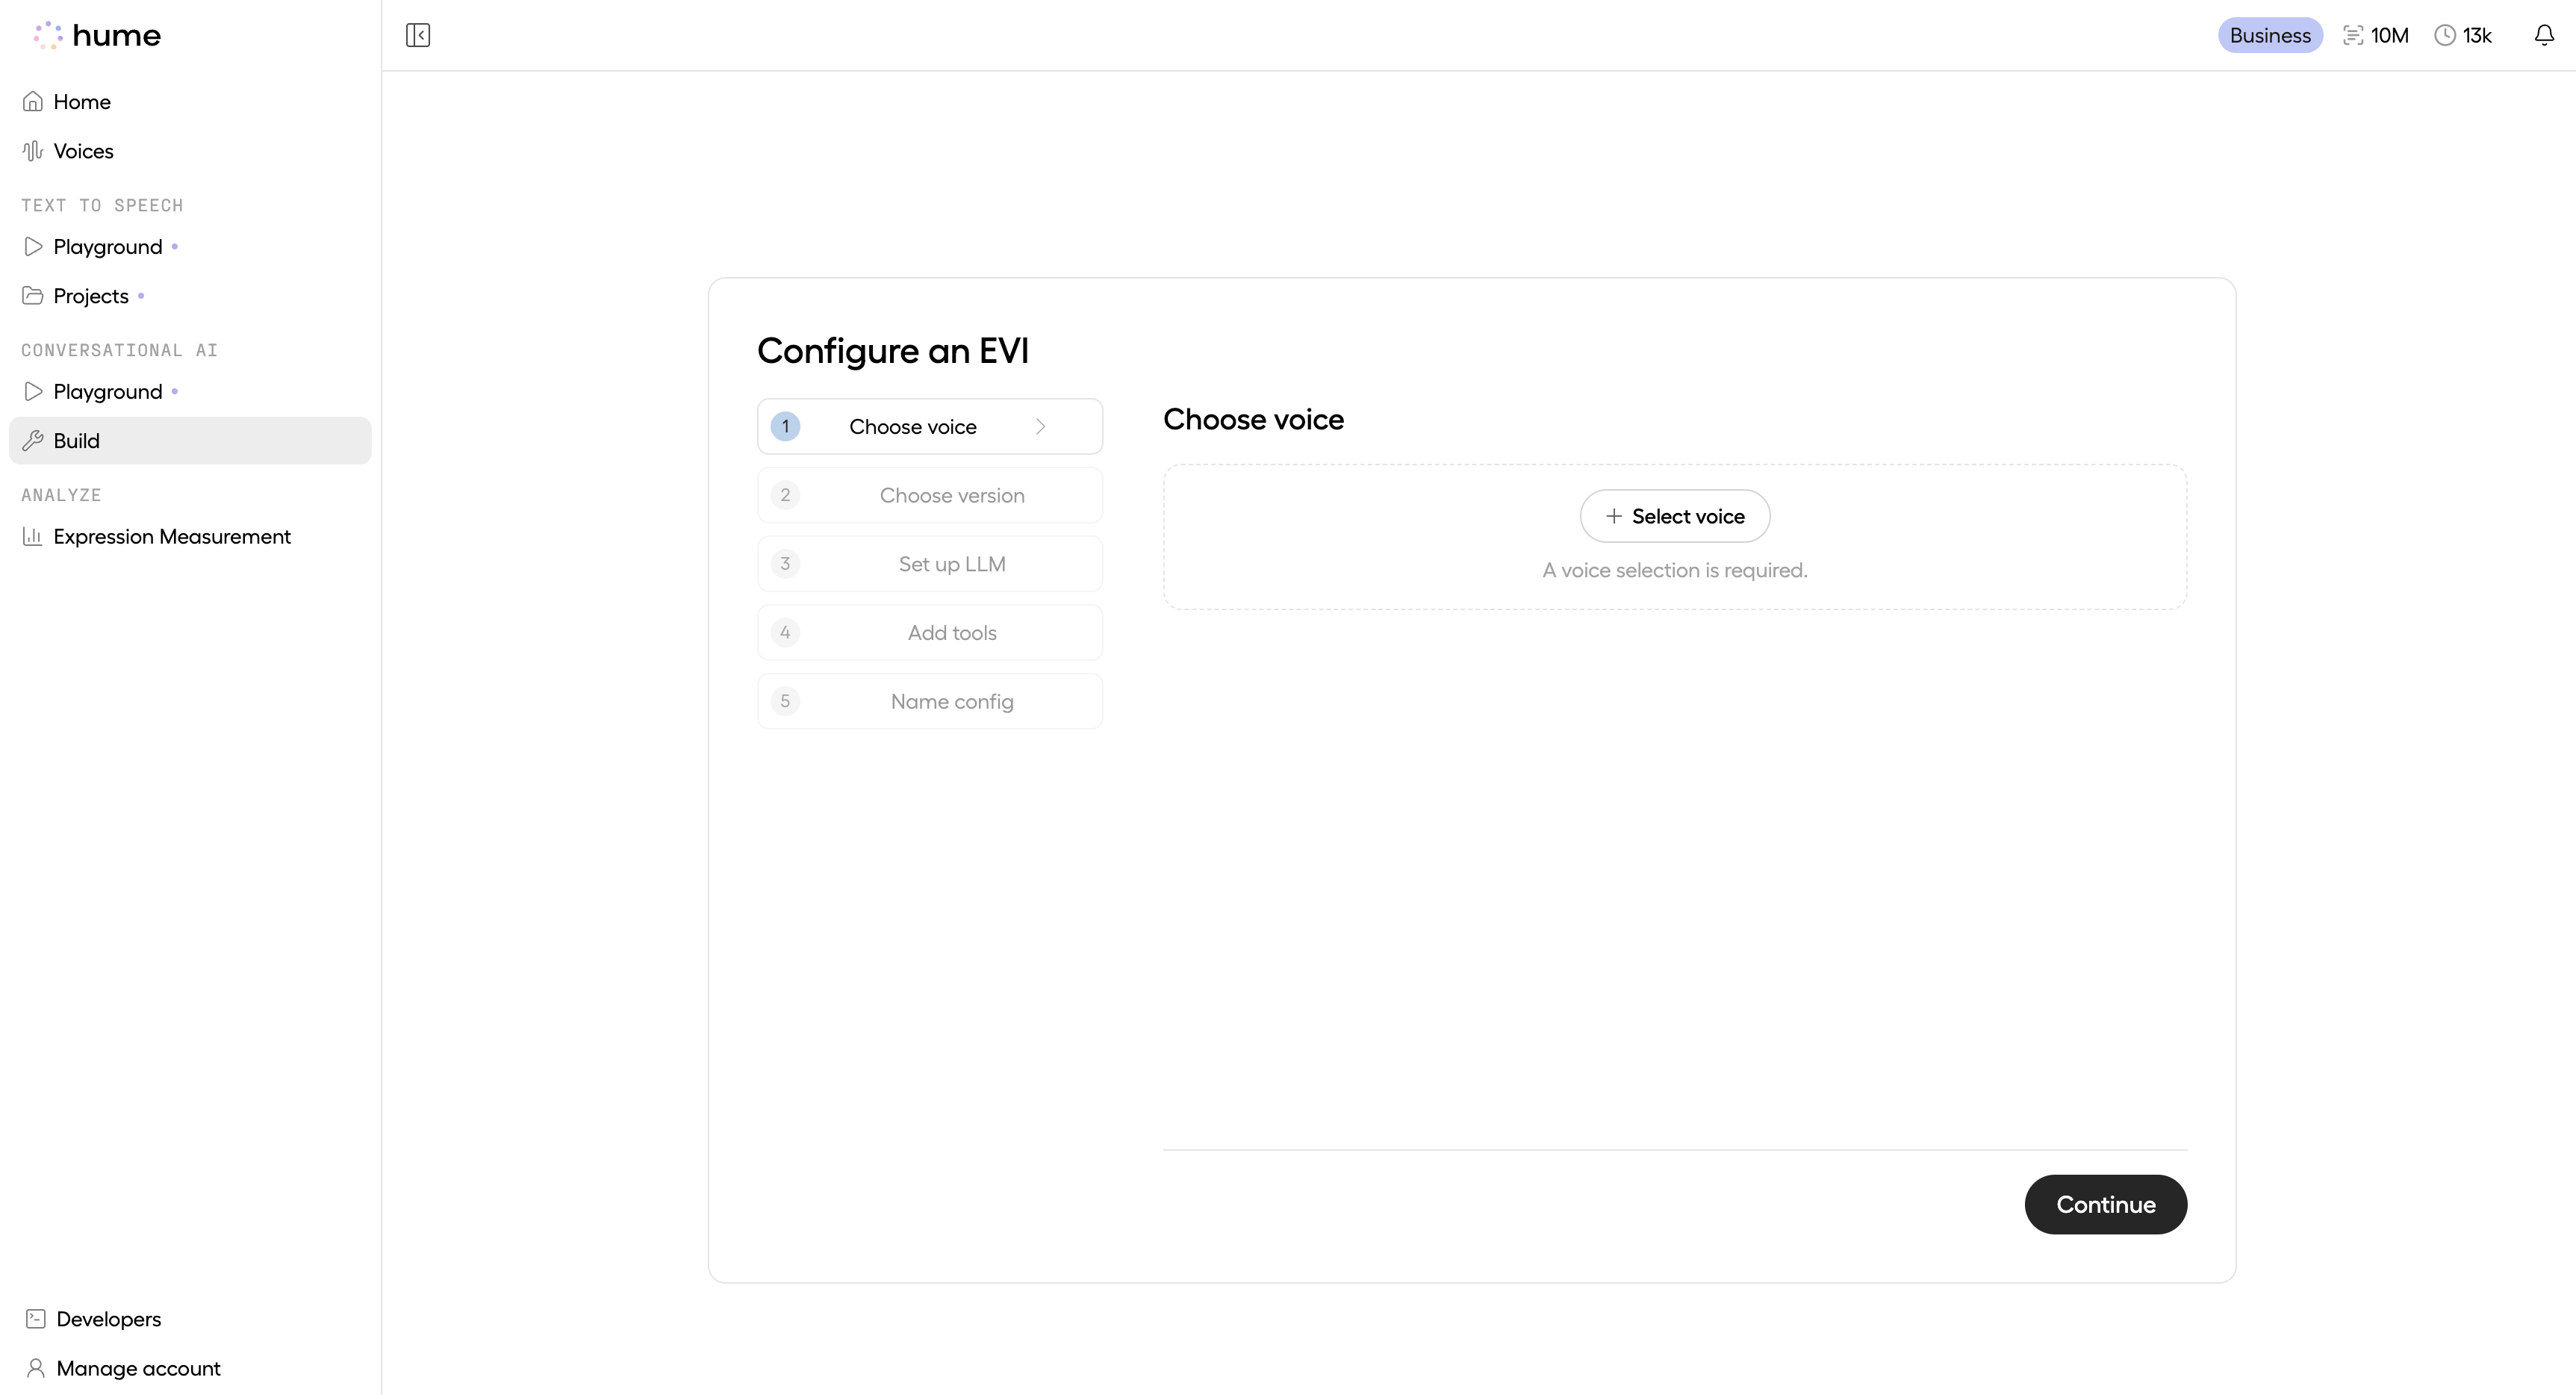
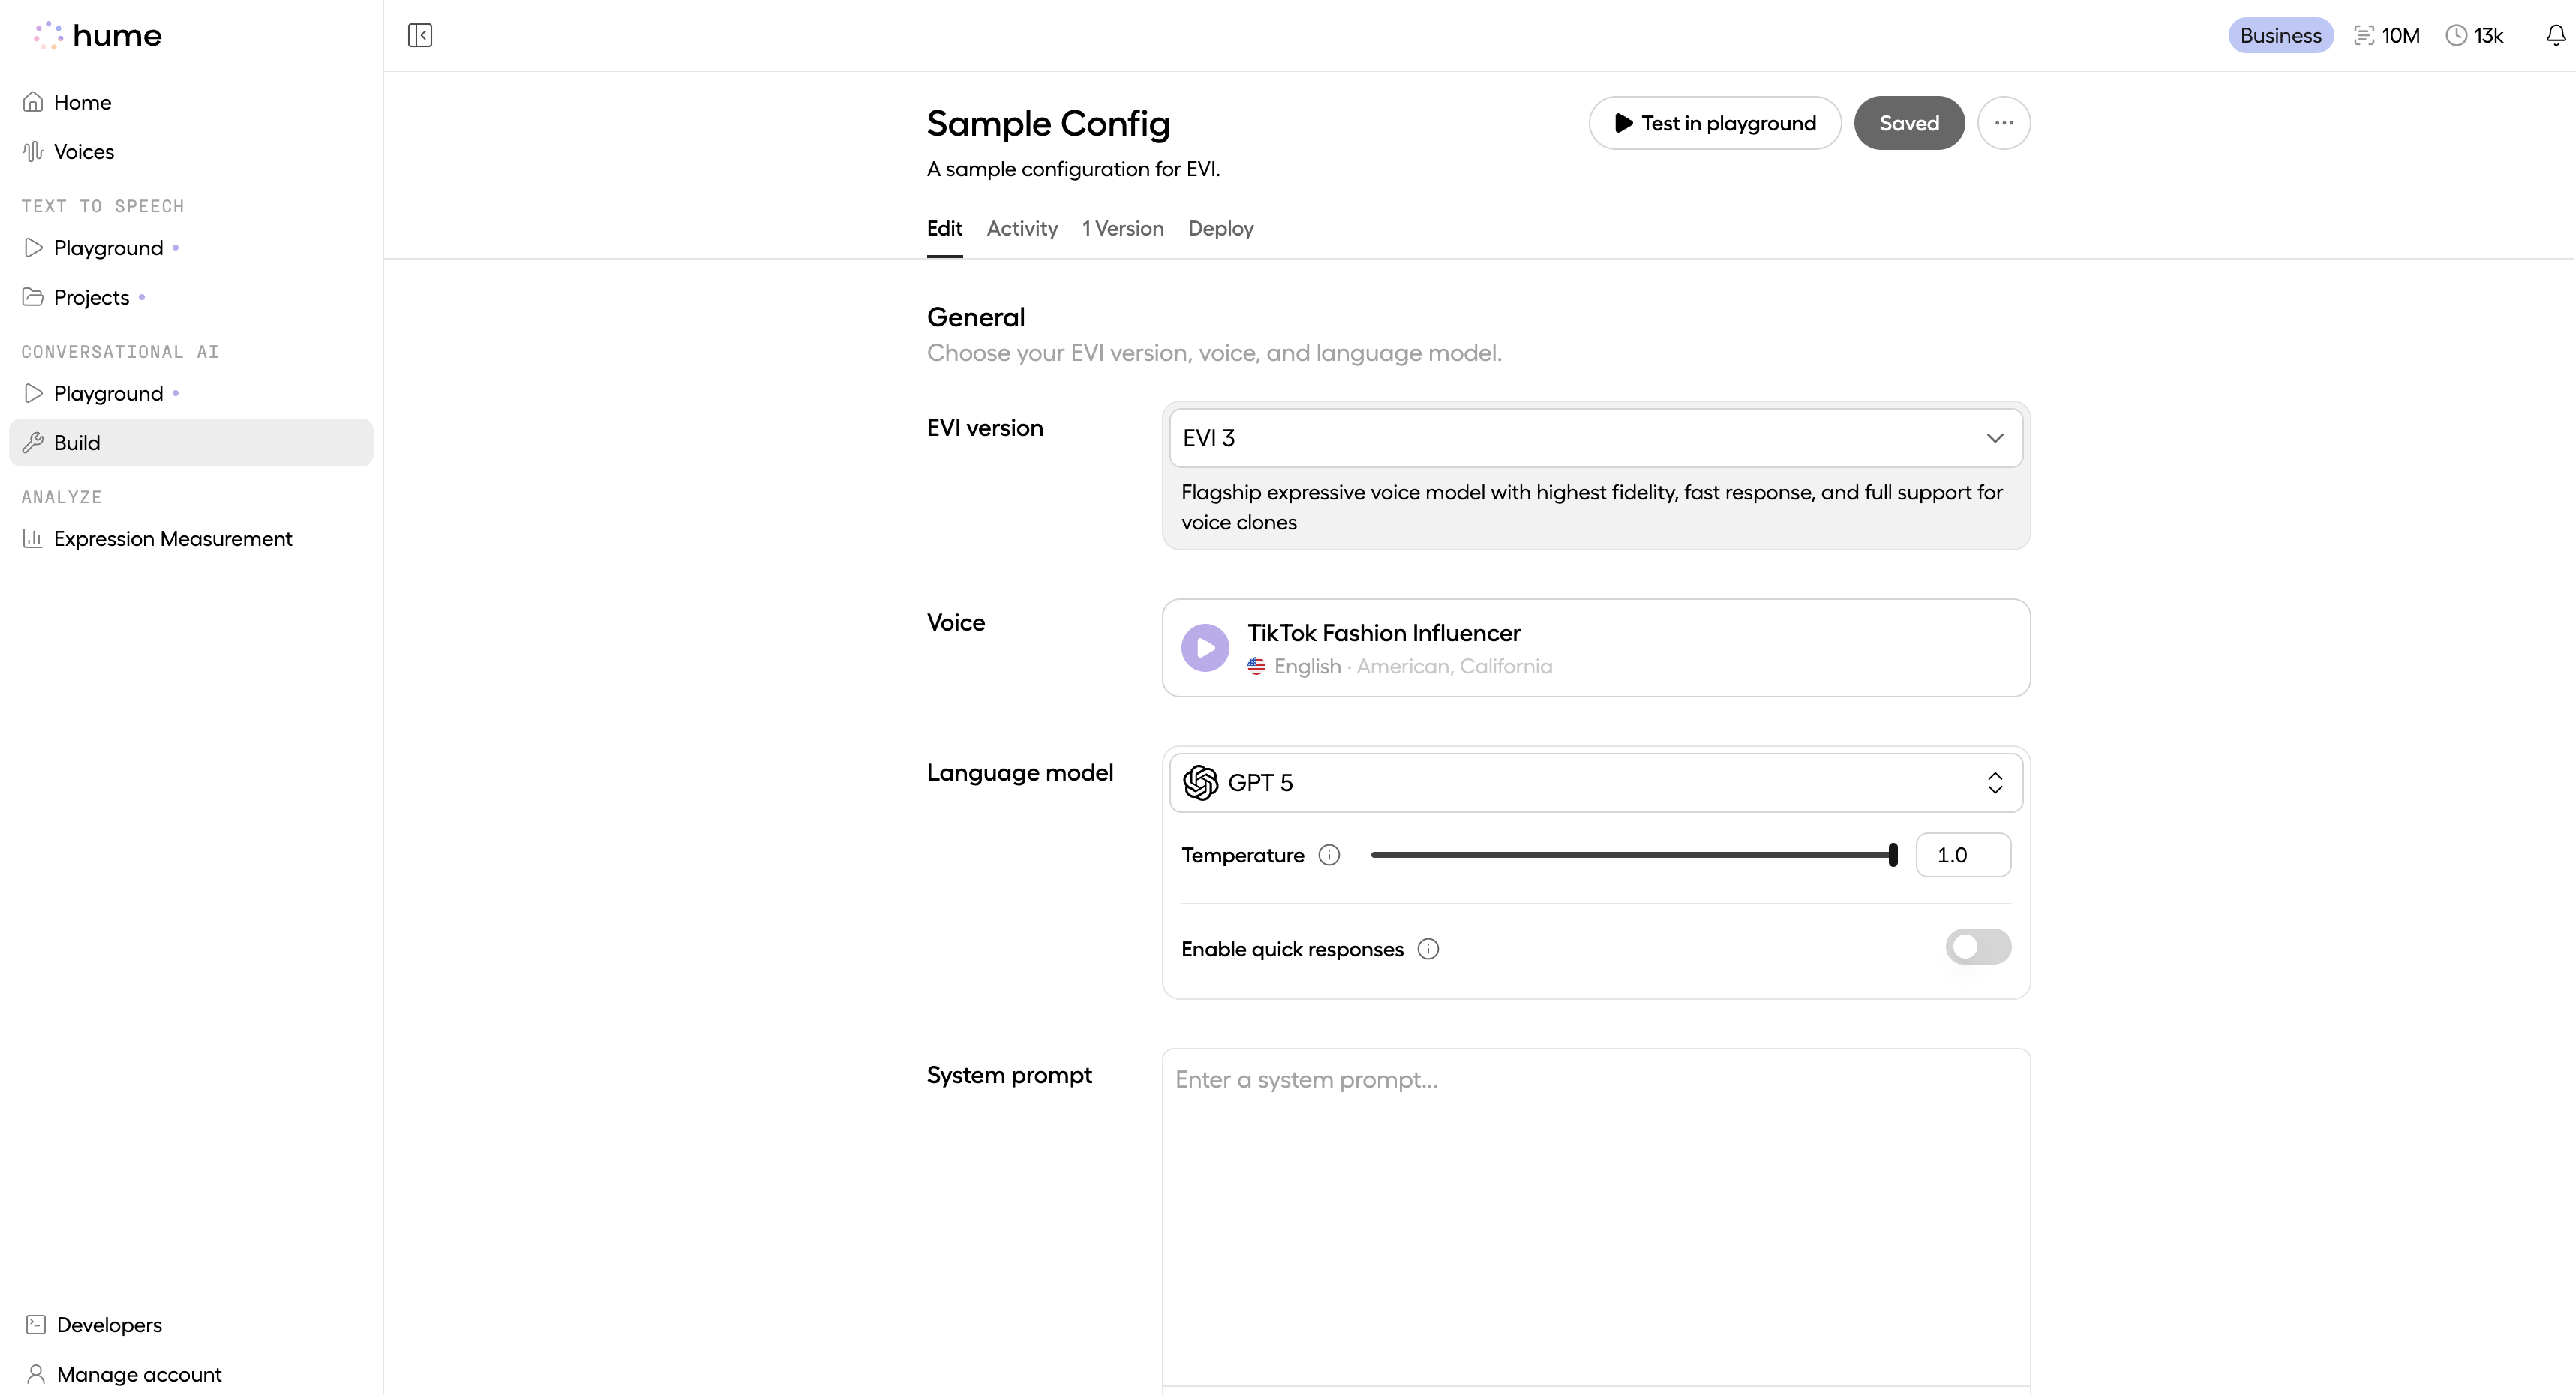
Choose voice
Select a voice from Hume’s Voice Library, or create your own custom voice. To learn more about voice customization options on the Hume Platform, please visit the Voices page. A voice selection is required for EVI 3 and EVI 4-mini configs.
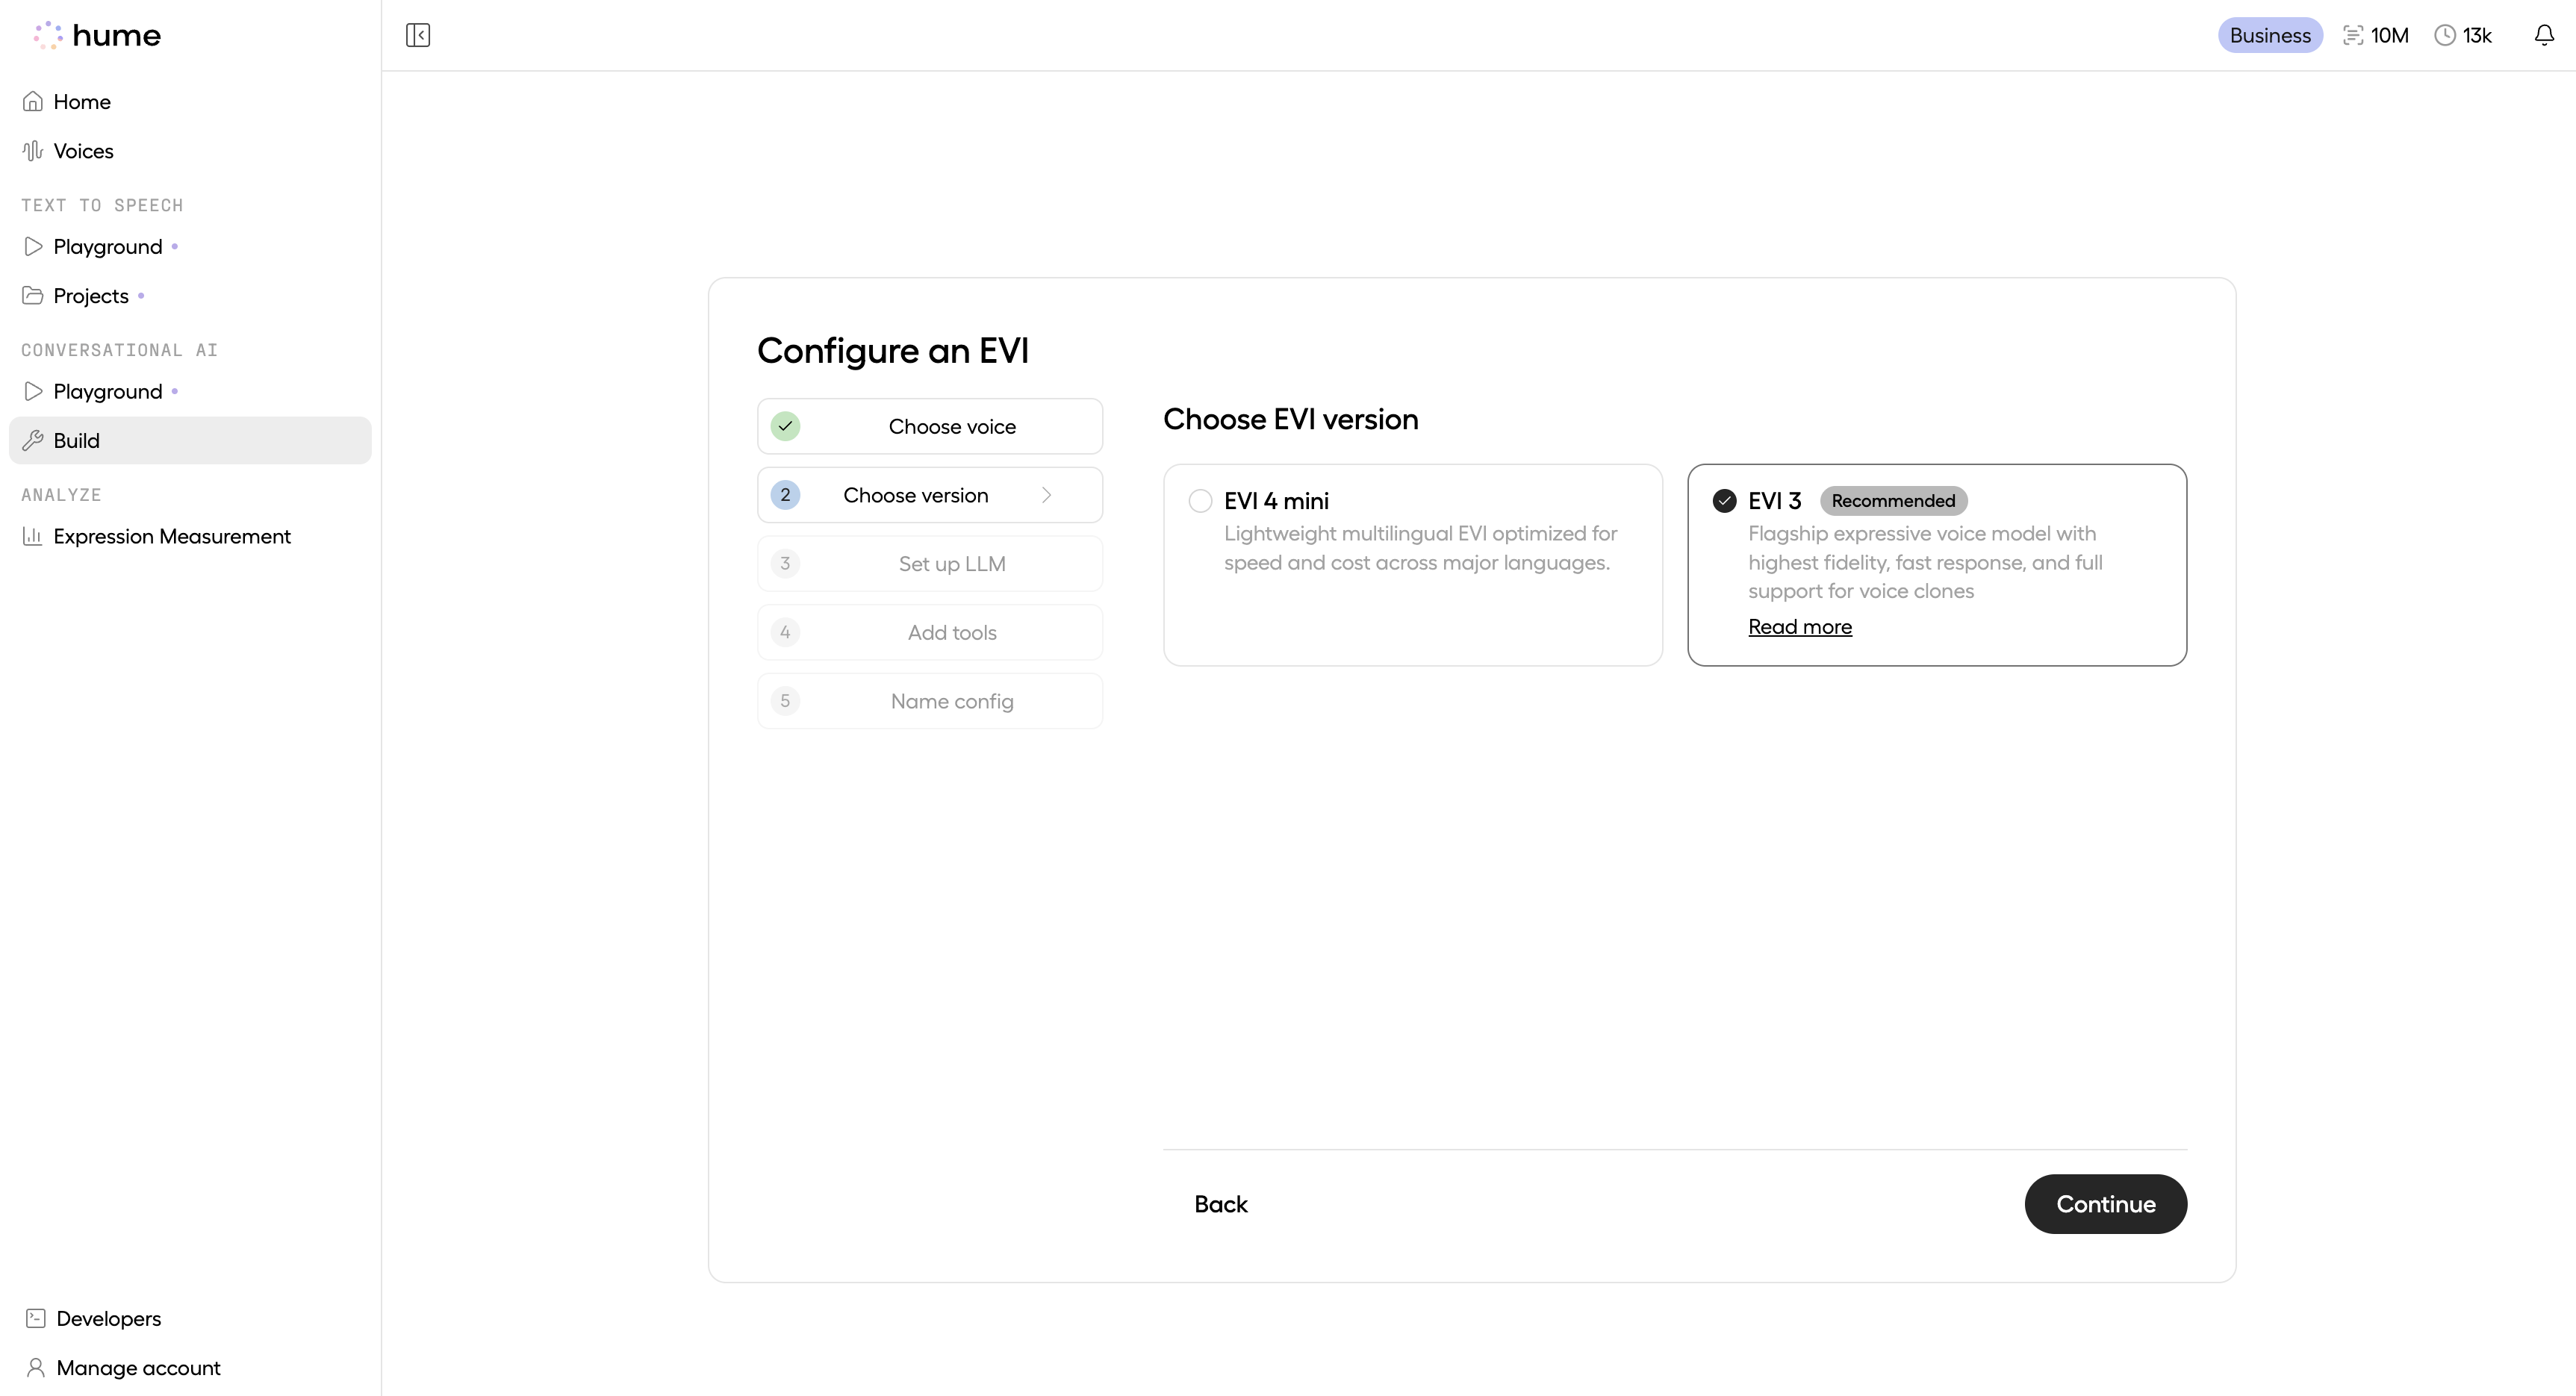
Choose your EVI version
Under EVI version, choose between EVI 4 mini and EVI 3. To learn more about the differences between EVI versions, see the EVI version guide.
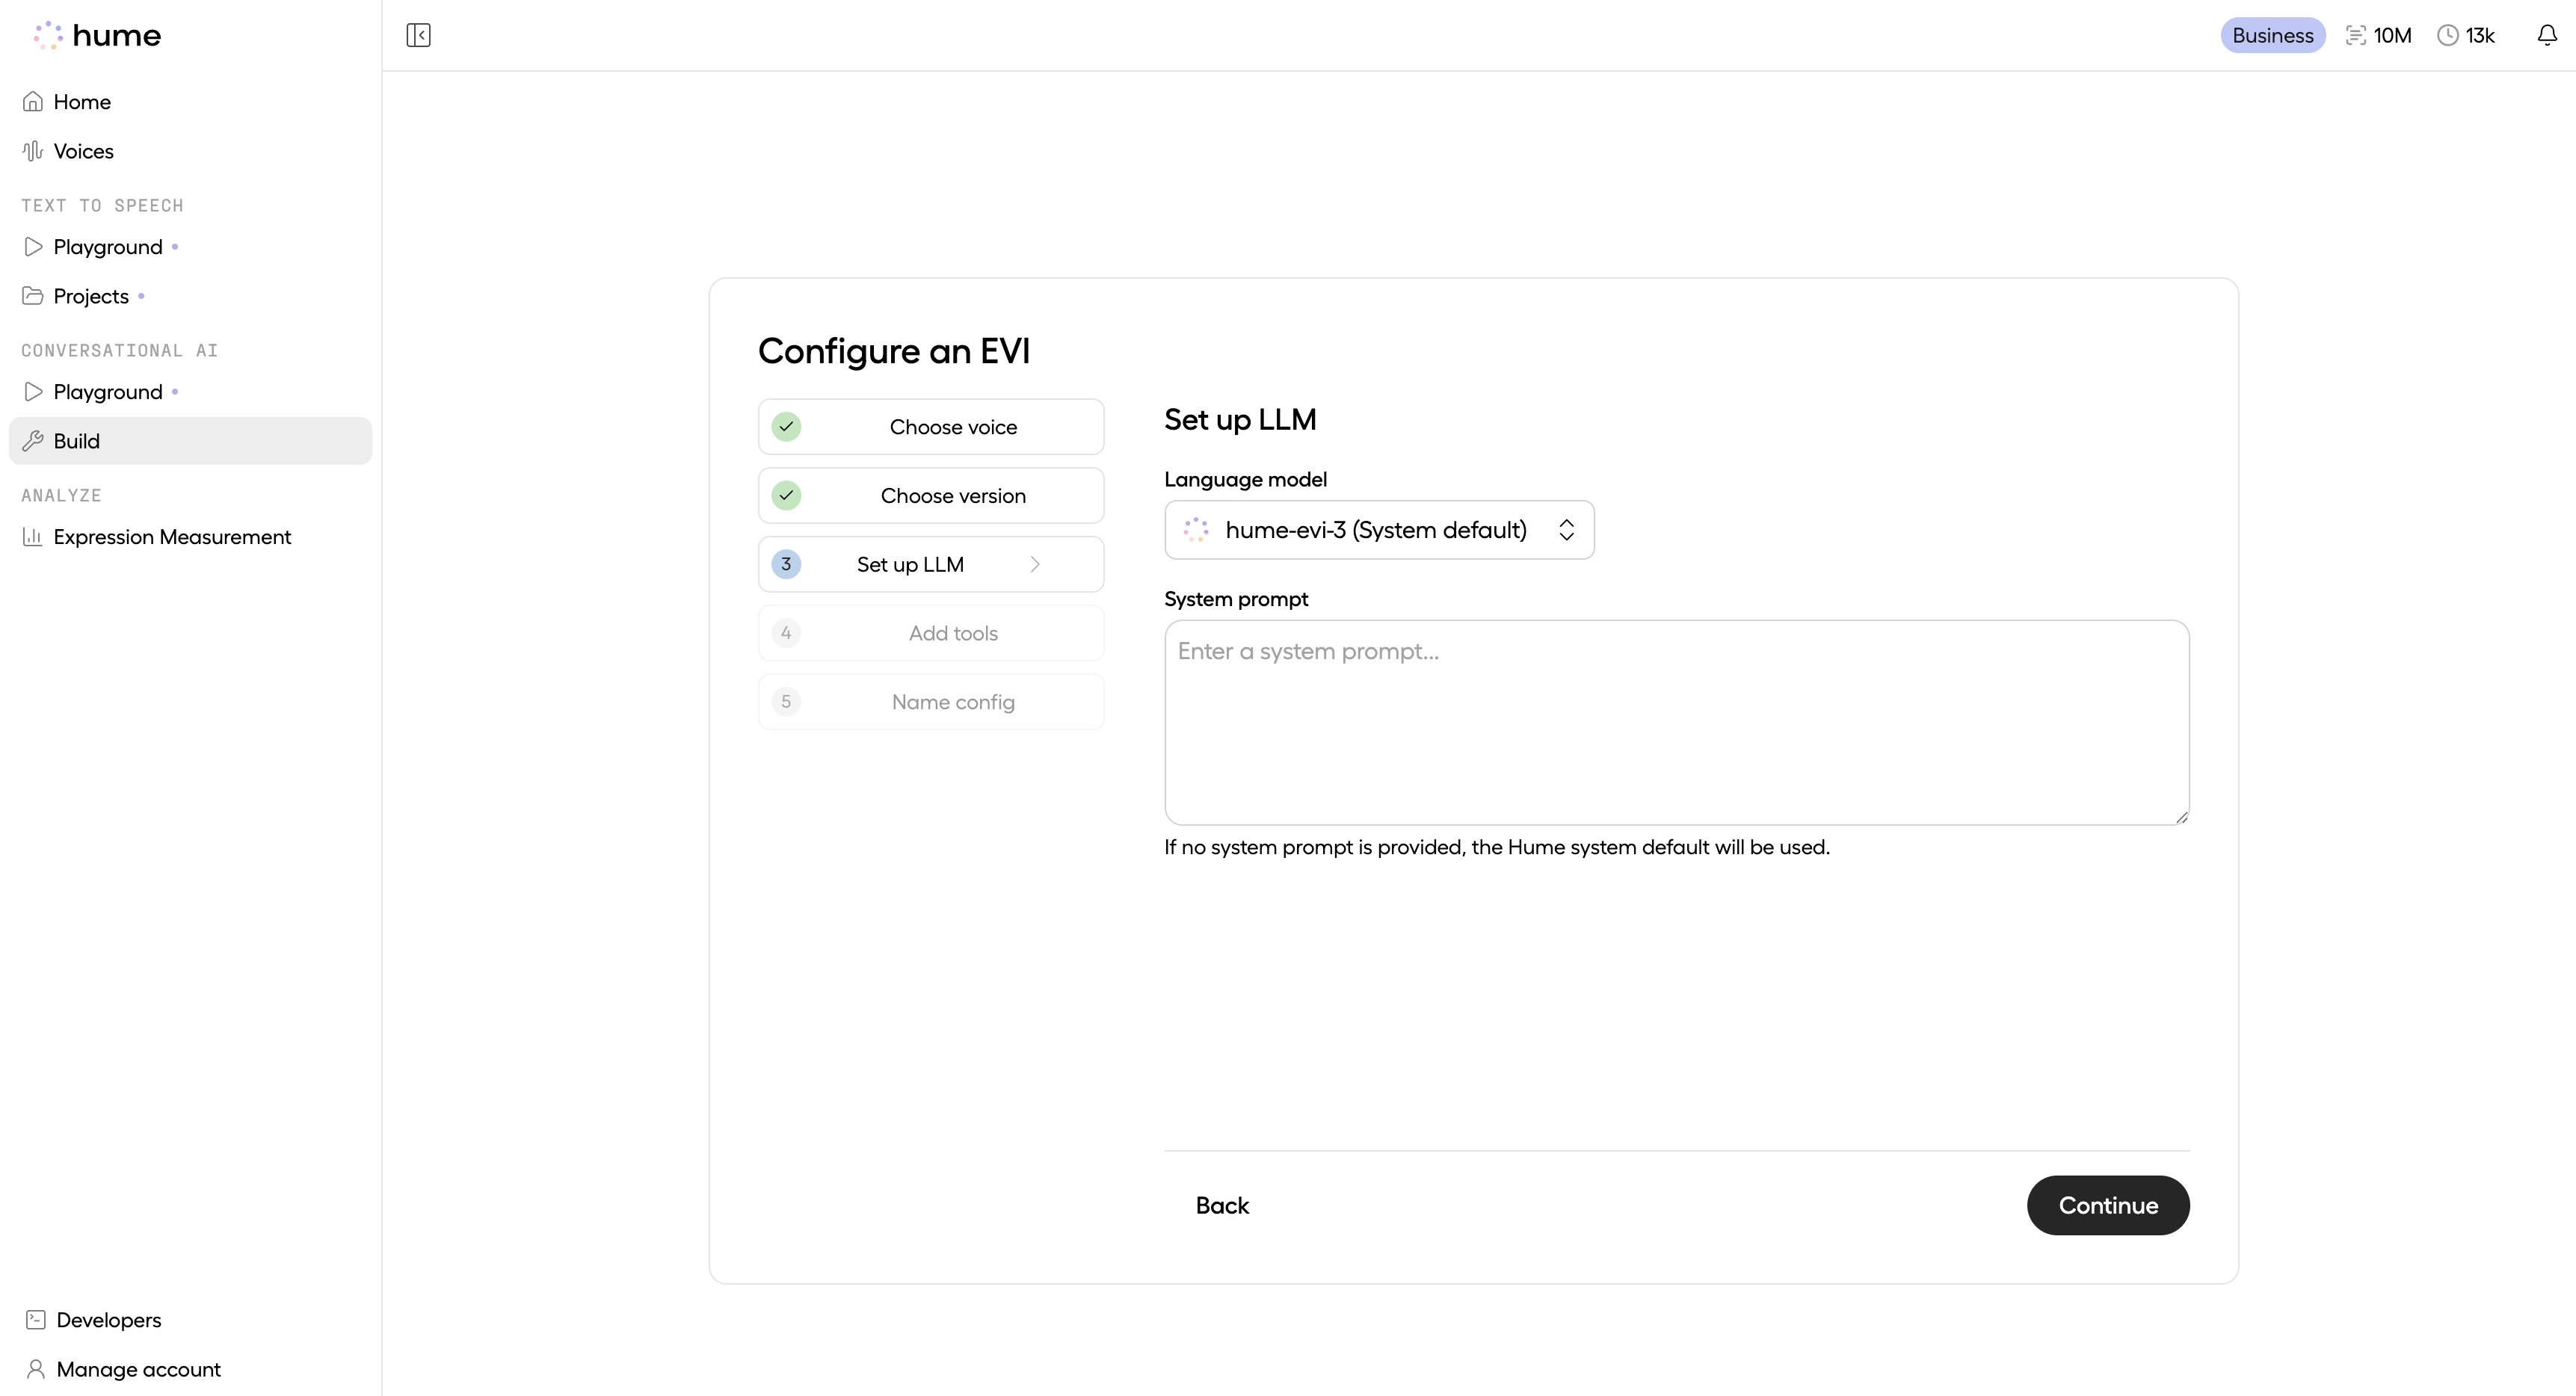
Set up the LLM
Select a supported language model and specify a system prompt. The system prompt is crucial for defining your assistant’s personality, capabilities, and behavior. For guidance on writing effective prompts, visit our Prompting Guide. If no system prompt is provided, the system default prompt will be used.
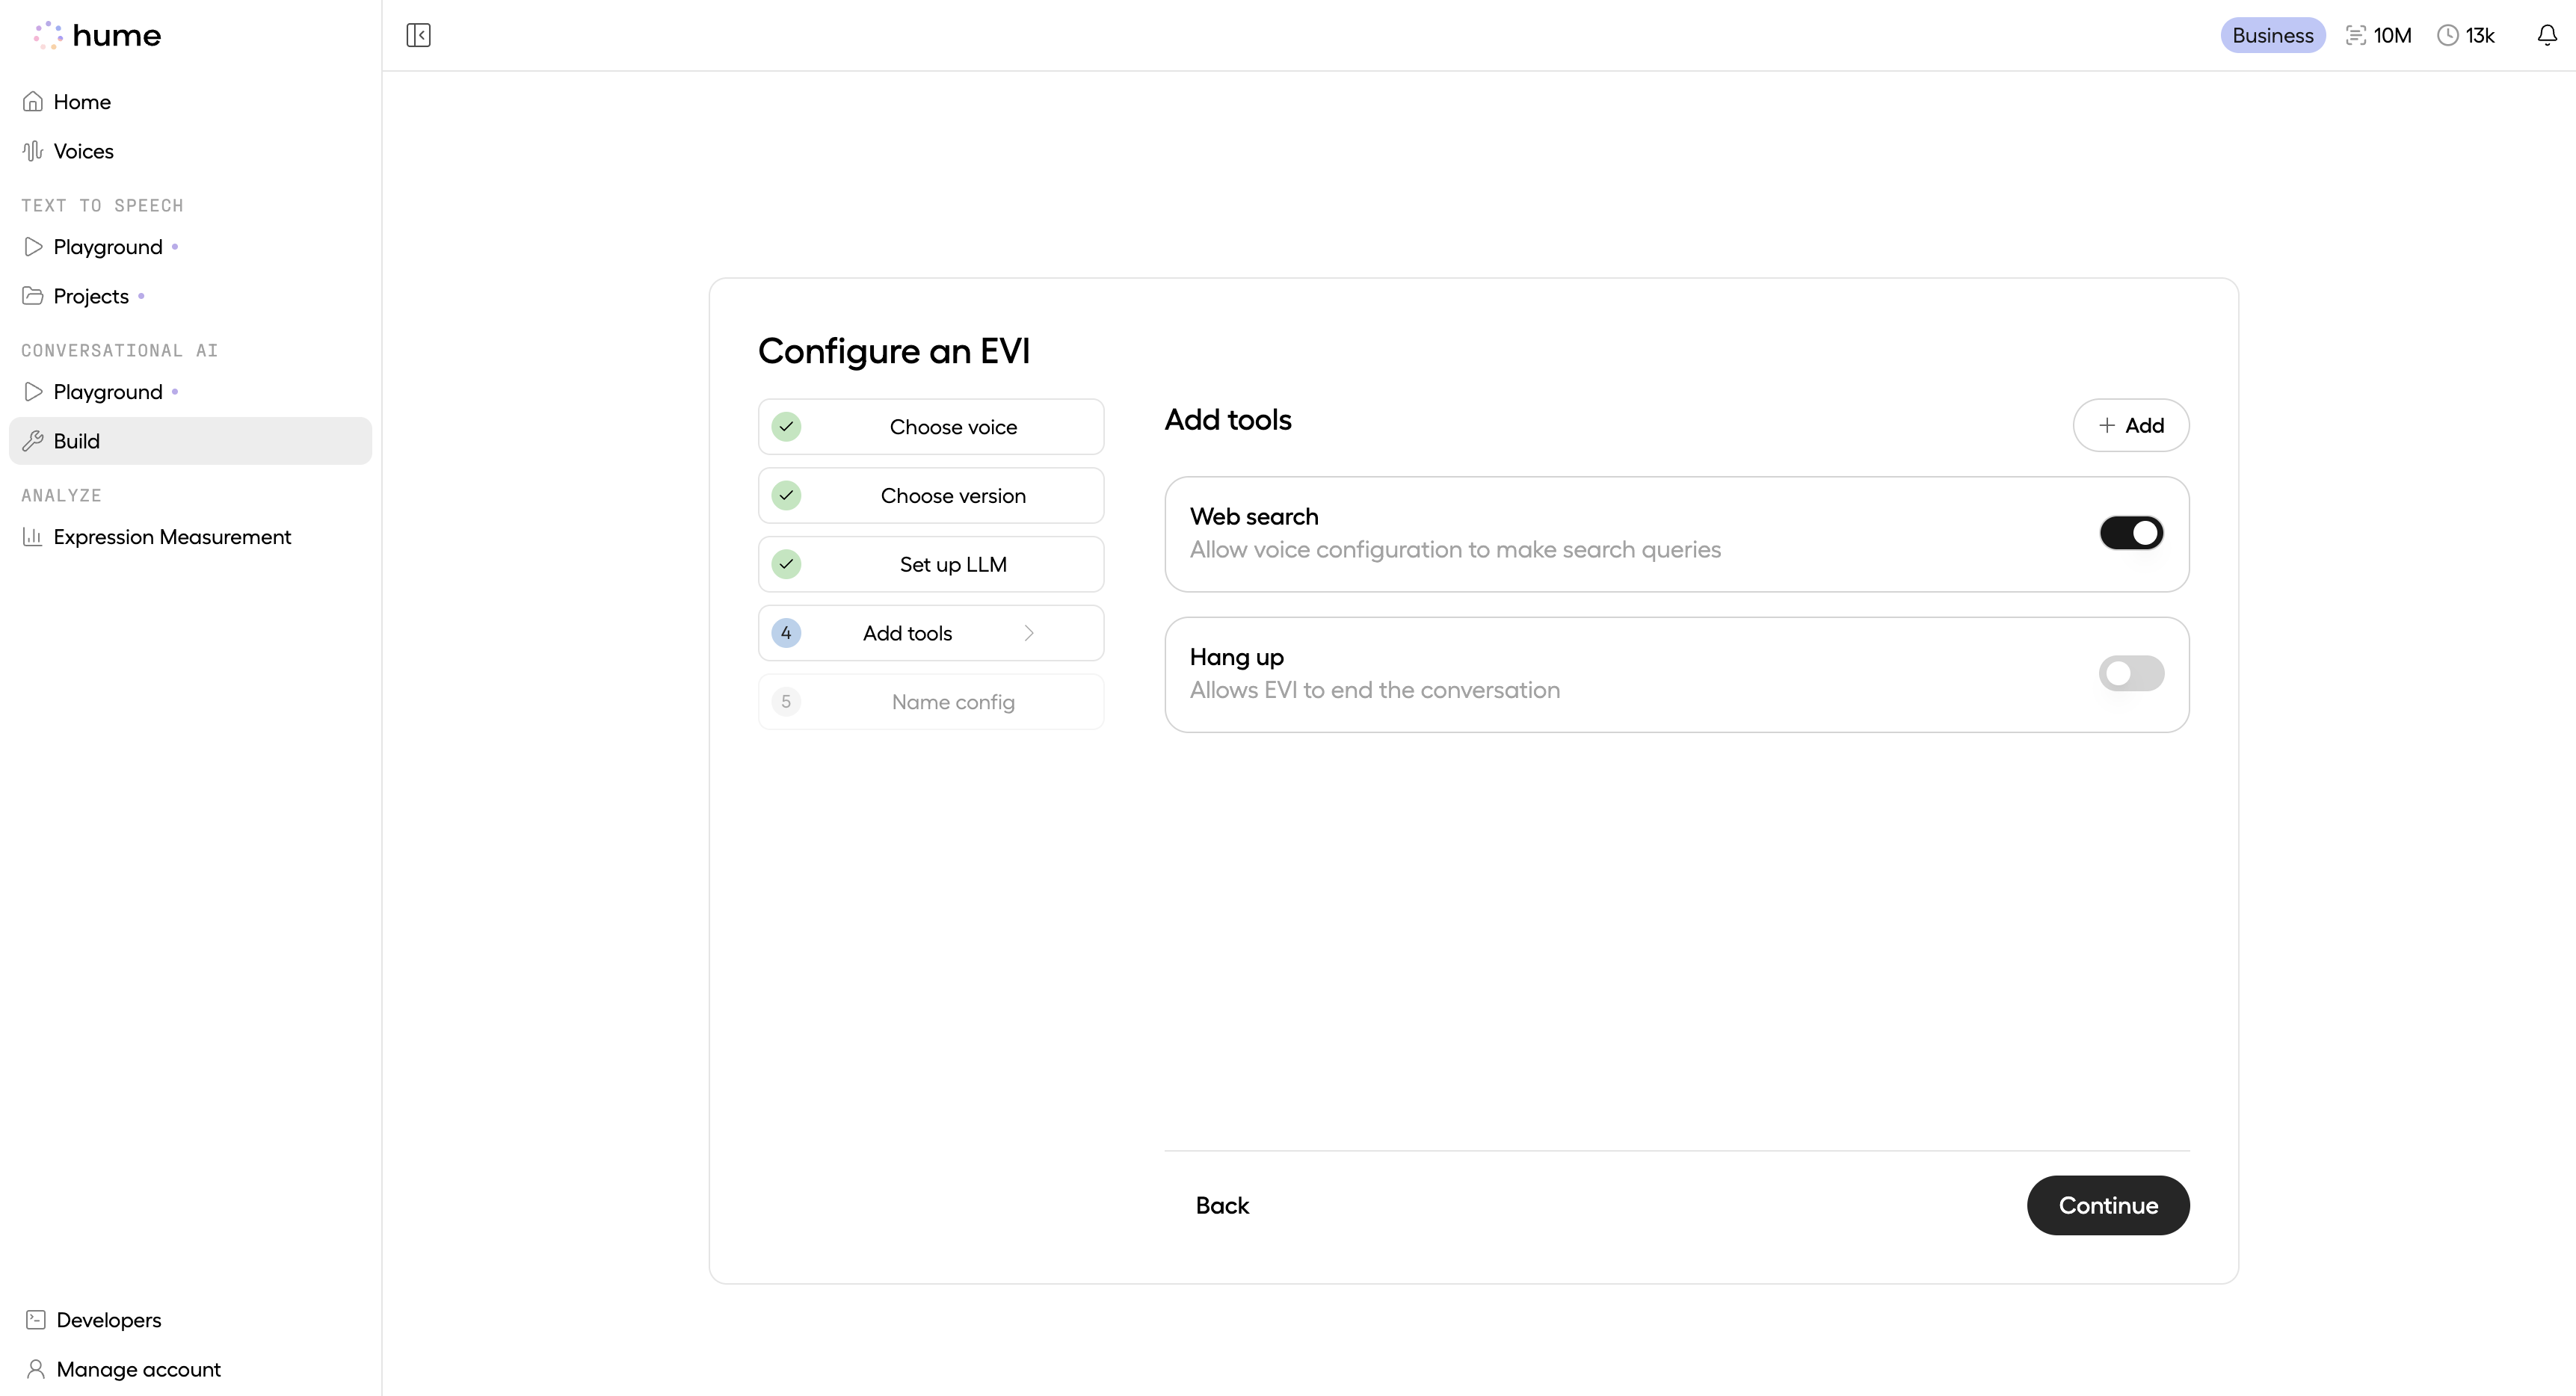
Add tools
EVI comes with built-in tools (Web search and Hang up) that you can enable.
To add custom tools, click the + Add button, which allows you to either select from your existing custom tools or create a new one. For more information about tools and creating custom tools, visit the Tools page.
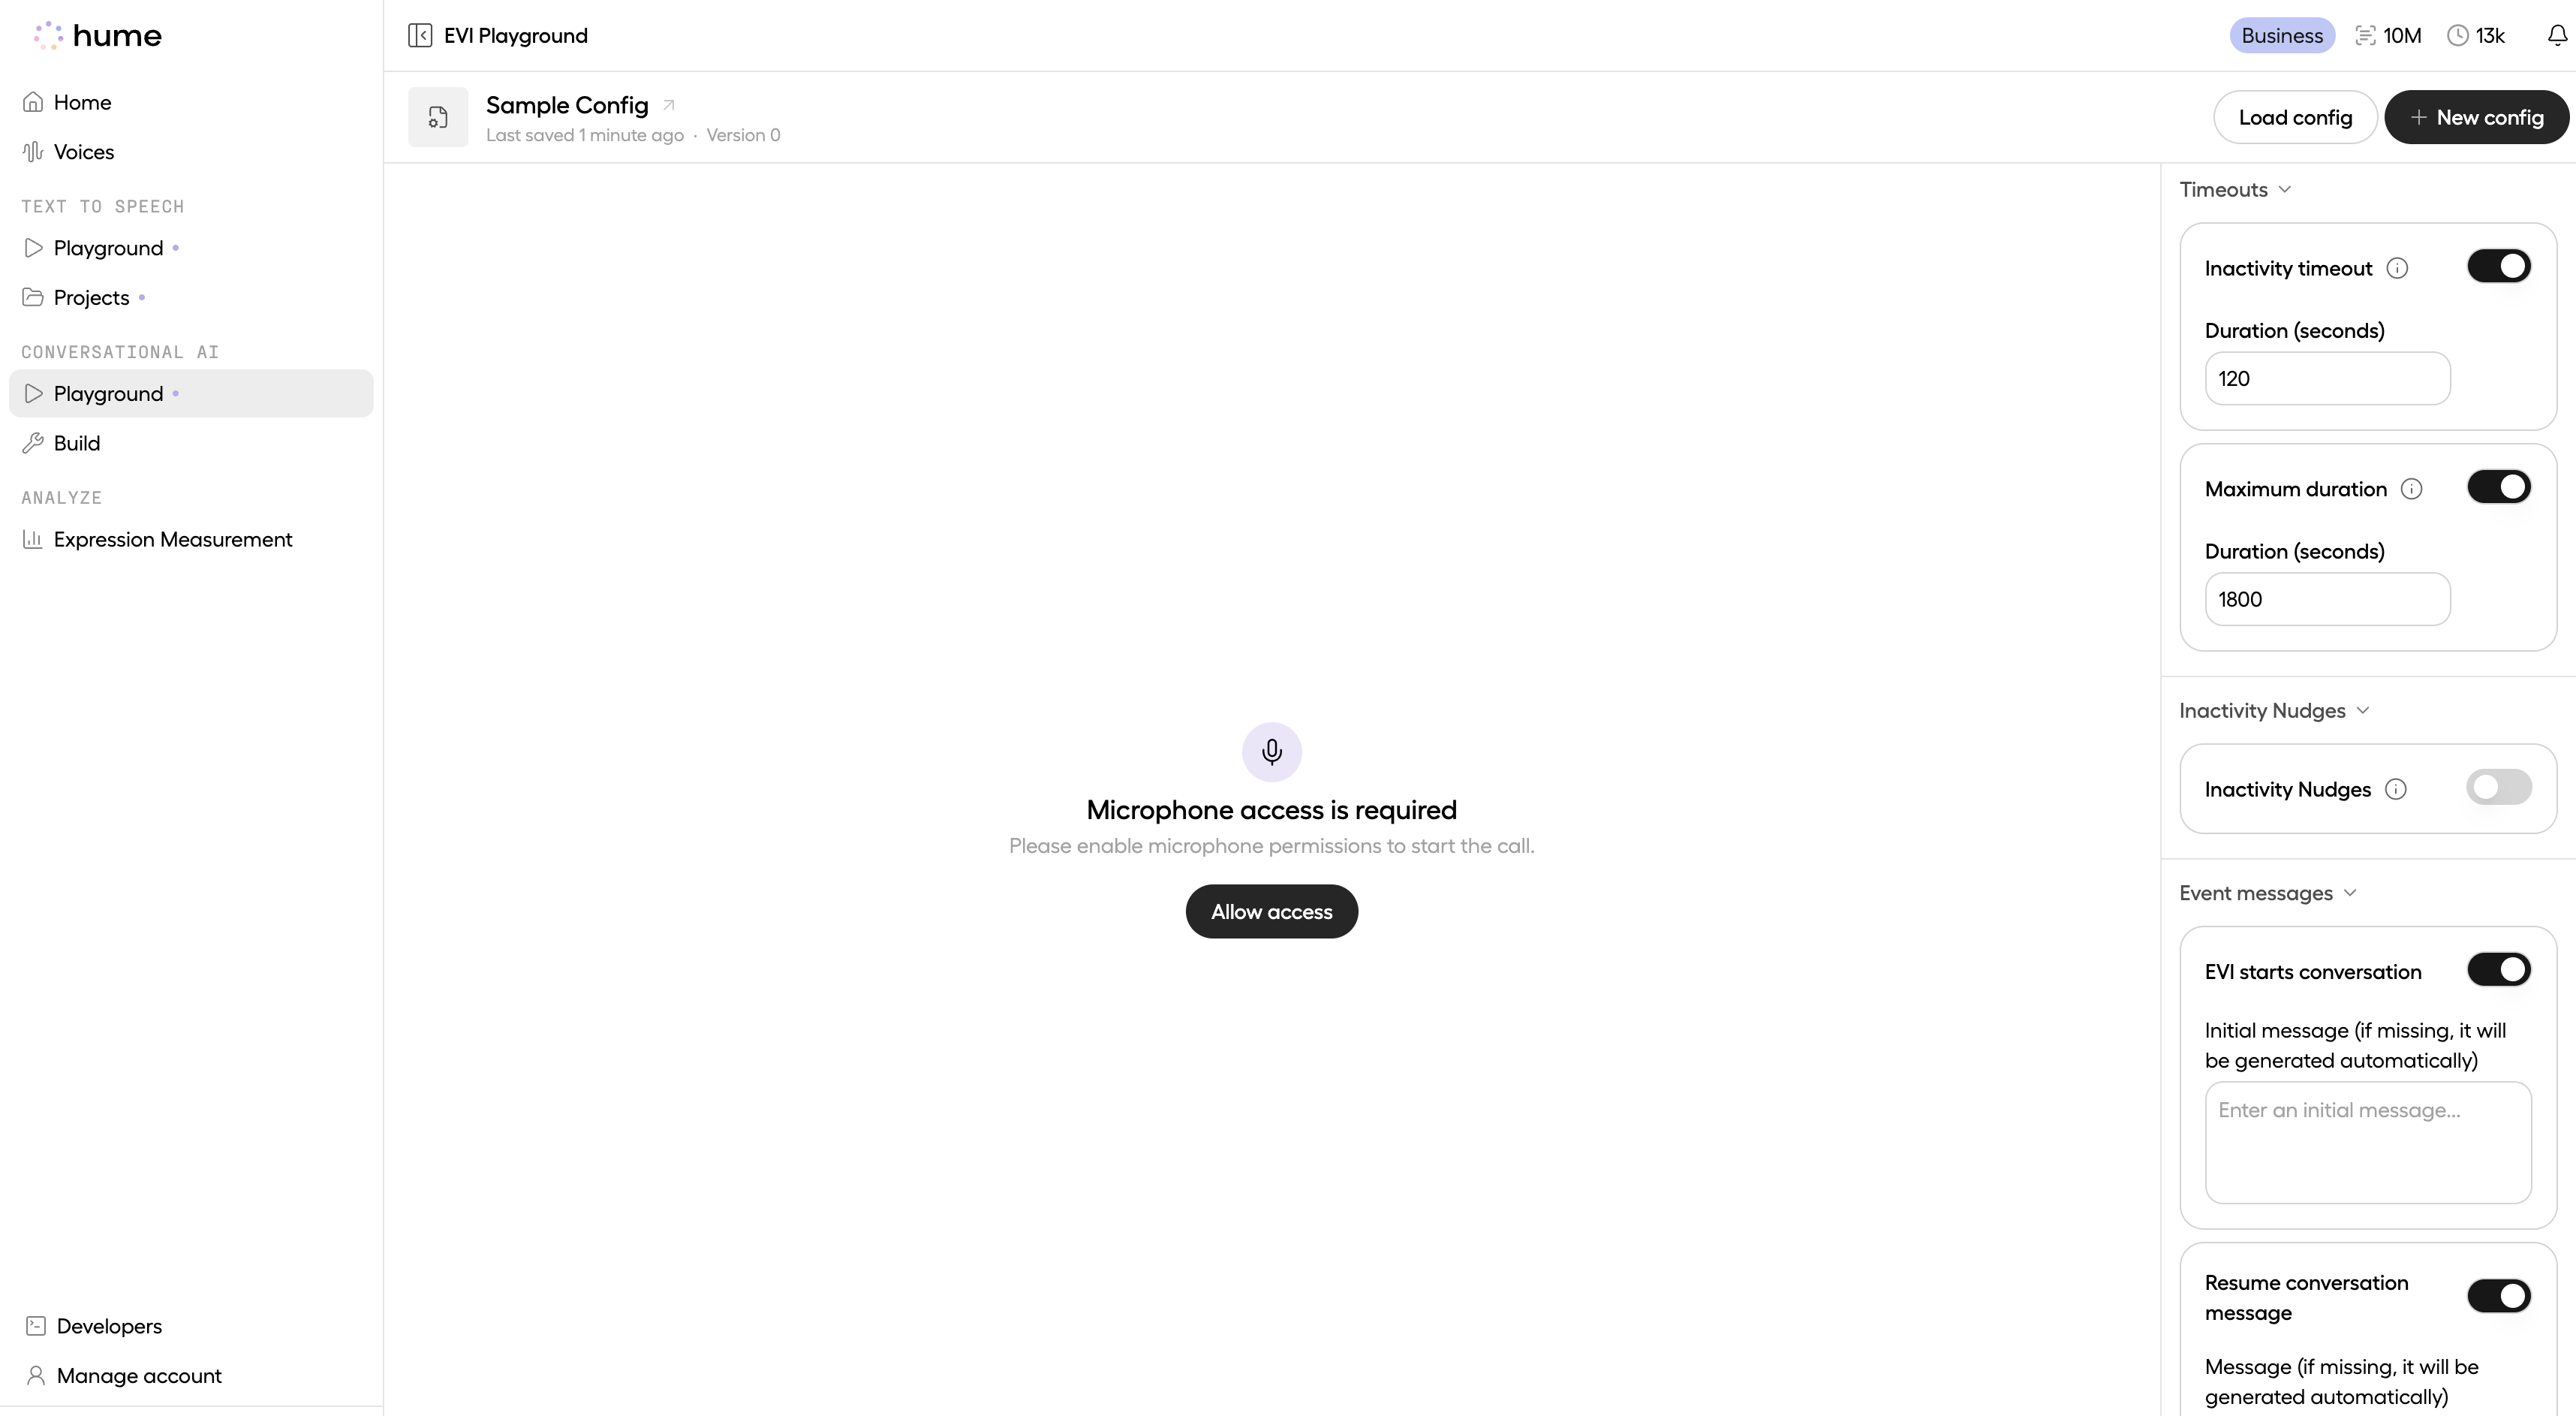
Test the configuration
The newly created configuration can now be tested. Click Test in playground to go directly to the EVI Playground and verify that your configuration works as expected.
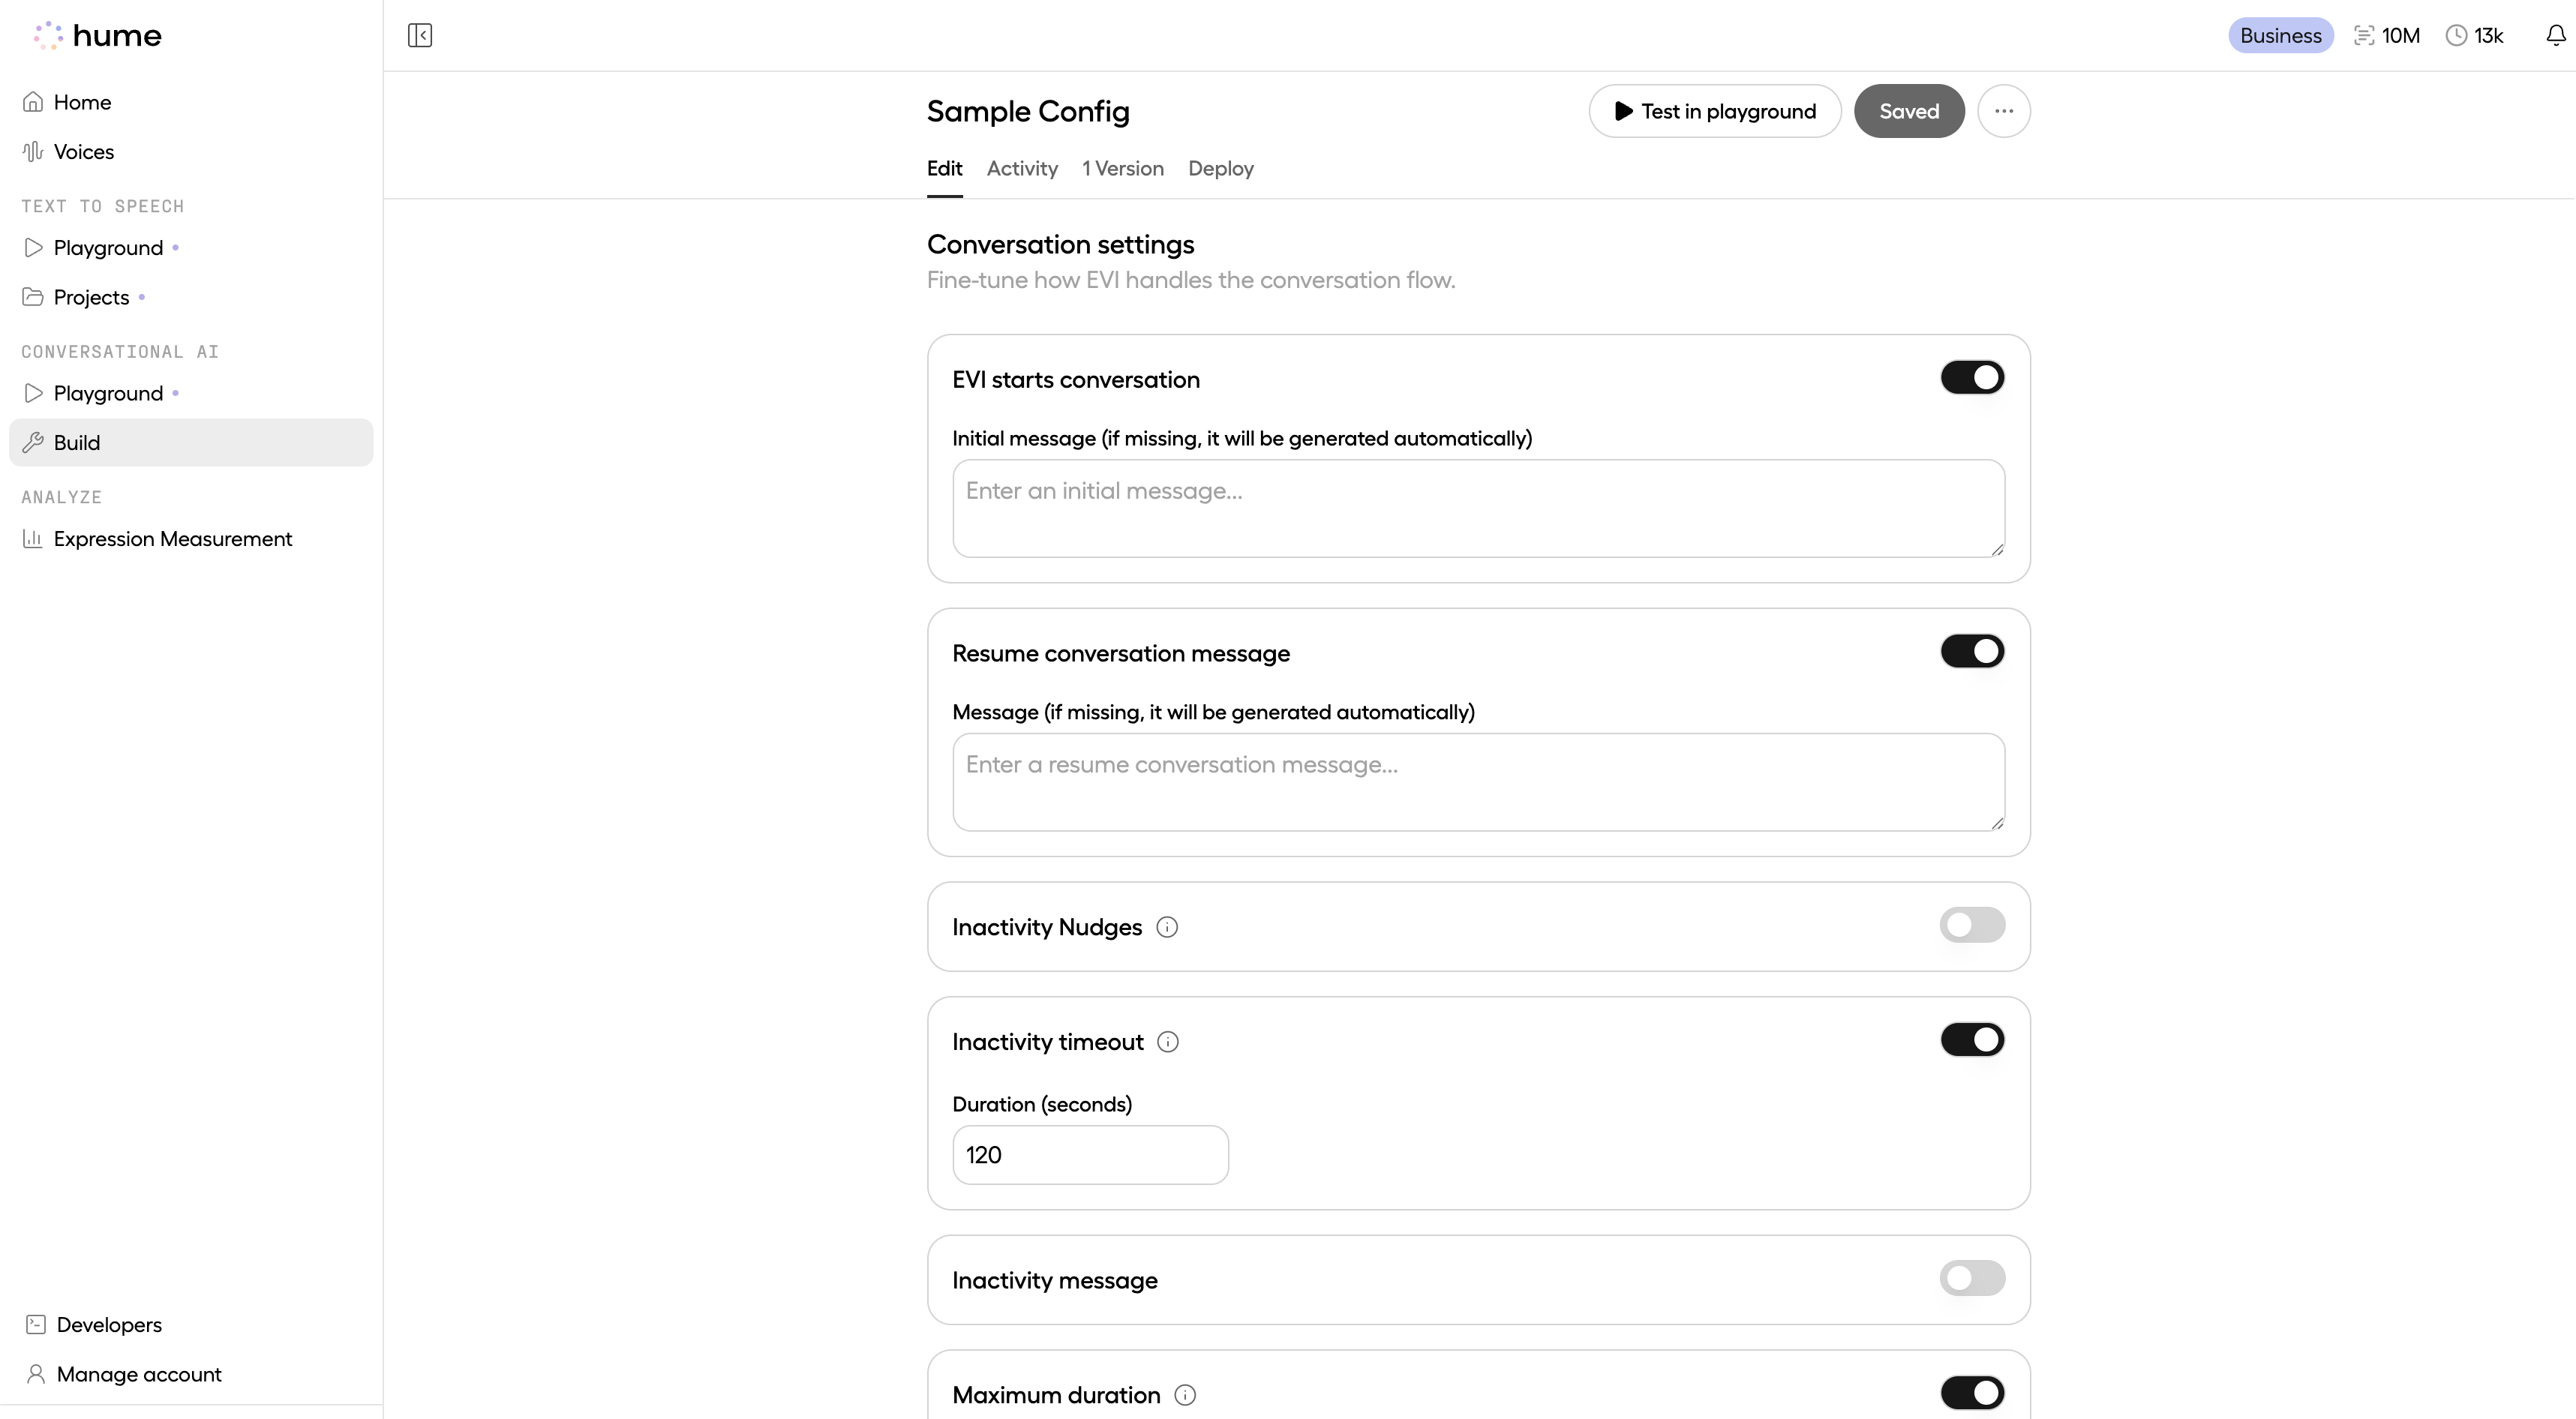
Set additional configuration options
Additional configuration options can be set after the initial config creation flow:
- Quick responses, event messages, and timeouts can be configured through the Platform (either in the Playground or Config edit page).
- Webhooks can be configured through the API. For detailed instructions and code examples, see our webhooks guide.
Apply the configuration
After creating an EVI configuration, you can use it in your conversations with EVI by including the
config_id in the query parameters of
your connection request. Here’s how to locate your config_id:
- Navigate to the Configurations page.
- Click the More Options button next to your desired configuration.
- Copy the Configuration ID.
See the code snippets below for how to apply your configuration: